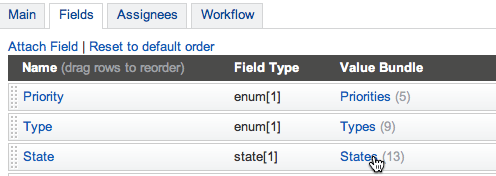
I had to set up a new project yesterday on YouTrack and needed to customize some of the default status fields. One of the ones I added was a ‘Paused’ status, for those times when a task gets held up for whatever the reason. Adding a custom value is pretty simple to do: under Administration, select the project, click on the the Fields tab, and click on the Value Bundle link of the field you want to update, in my case the State field
Once there, select Add State and type in the new value. You can give it a description and an optional color. I chose an orange tone to indicate its paused [Resolved checkbox indicates if the state represents the issue as resolved].
That was pretty simple. However, there is a minor issue. I want to know why a task is paused, much like I’d like to know why an issue is closed as ‘Will not fixed’. I’d like the person pausing it to provide a comment as to why the task has been put on hold. How can I accomplish this in YouTrack? How can I force someone to submit a comment when a state is set to Paused.
Workflow Editor
This is where YouTrack’s workflow editor comes into play. I looked at this tool nearly 2 years ago and I must say, there have been some major improvements. However what really shocked me was how simple it was to get up to speed. In less than 15 minutes I had downloaded it, created a custom rule and had it working on my project.
The workflow editor is based on MPS or Meta Programming System. If you’re not familiar with this, it is an extremely powerful Open Source tool from us that allows you to create and extend languages. But it’s not limited to only creating a DSL. It also provides you with the means to create editors, complete with Intellisense, Code Analysis and Debuggers. In fact, YouTrack itself is based on a language called WEBR which is developed on MPS.
The good news of course is that you do not need to know anything about MPS to work with Workflows in YouTrack. There’s already a packaged-up, self-contained editor that provides you with everything you need.
Let’s see how we can use this to add some spice to YouTrack.
Scenario: Requiring a comment when changing a state
The problem we are going to tackle is the one mentioned previously: we want the user to fill out a comment when changing the state of an issue. Since there’s no specific workflow built for this, we need to create one. As such, we first download the Workflow editor. You can do this from YouTrack itself, under the Workflow tab
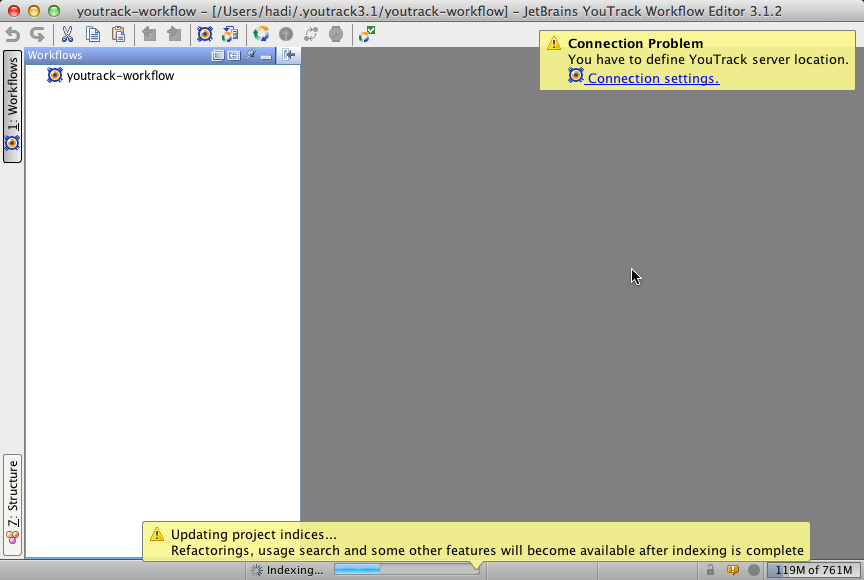
Once download (it works on any platform as it’s based on Java), open it up. The first time you run it, it will display a hint box that the connection settings to the server need to be defined. You DO NOT need to have root permissions to the server to define workflow. You DO NEED however Administrative privileges on the Projects you want to use your workflows with.
1. Define these settings by clicking on the Connection Settings link. You can always change them later by clicking on the Workflow | Connection Strings menu entry.
Once you verify the connection, you are ready to start defining some workflows. On first run, it will prompt you to download existing workflows from the server. If it does not or this is a second run, click on Workflow | Download Workflows from Server. A good reason to do this is that you will get all predefined workflows in YouTrack which serve as great examples for defining new ones.
If all goes well, you should end up with your Workflow explorer having some entries:
2. Define a new workflow
The next step is to define a new Workflow. Every workflow we define is imported in to YouTrack as its own package. As such, a workflow allows us to group several specific rules together. We’ll get into what rules are in a moment.
To create a new Worfklow click on the Create Workflow icon on the toolbar
Give it a name. I’ve followed the convention to use server_name-project_name-description_of_workflow:
Next step is to decide what type of workflow this is:
In this scenario, we’re going to create a Stateless Rule (we’ll cover the other two options in a future blog post). A Stateless Rule means it doesn’t hold any state. In our case, we want to make sure every time a field holds a specific value (Paused) a comment is required. We’re not interested at this point, what the previous value of the field was, so we won’t need to hold state.
Here’s where it gets interesting. When you create the rule, a new editor is opened up. This is the rules editor. It’s a complete IDE (the power of MPS at work) that provides us with all the goodies such as syntax highlighting, code analysis and other things. First thing it prompts us for is a name.
We’re going to call this rule Changing to pause requires comments. Note that for the rule name, spaces are allowed:
The next step is to define the actual rule. Now as a newbie, it would kind of hard to know what can be done here. Fortunately, when we downloaded all the workflows, these all serve as examples. Added to that, we have Intellisense available too. Placing our cursor on the <issue…> and hitting Ctrl+Space, we get:
This has been filtered down to everything starting with ‘S’ because we’re interested in dealing with a State change. We can see that we have the State entry available. If you’re wondering where these values come from, much like YouTrack Search Facility, it provides us with information not only on fields, but also on values of these fields. Entering State now displays:
and we can select the becomes entry, which as the hint (albeit incorrectly) says, is an event that occurs when the value changes to a specific value. Unsurprisingly, becomes takes a value:
which is the new value of the field. In our case this would be ‘Paused’. A couple of powerful things to notice before we continue. If we enter ‘Paused’ prior to creating that as a value on the server, the workflow editor will warn us that this value does not exist. It will even provide us with an Intention (in ReSharper known as QuickFix) to create this value for all projects:
The next part is to define the actual action we want to take place when this condition is met. Here we can use the assert statement
filling in the condition and the message appropriately. In our case it would be
With that, we’re pretty much done defining our rule. The only thing left to do is push it to the server to make it available and then use it in the project.
3. To upload the workflow with the server, we can select the Workflow | Upload Workflows to Server menu entry
waiting for the upload to finish
4. Once that is complete, we then go back to YouTrack and attach the newly created workflow to the project. We select again the Workflow tab on the corresponding project and click on Attach Workflow
If the uploading in Step 3 succeeded, we should now see our new Workflow in the Dialog box.
We’re done. Now when we change the state of an issue to Paused, it should display a message prompting for a comment
Summary
In this post I gave you an introduction to the YouTrack Workflow editor and we saw how to create a simple rule, upload it to YouTrack and put it in action. What’s more, the editor is based on MPS and hopefully you have seen the power that MPS can offer us. In the next posts I’ll show you how to create more complex workflows that involve scheduling and state machines.


