Today Paul Campbell asked on Twitter about the possibility of having an automated testing scenario using WebStorm and Mocha.
Although there’s nothing built in to WebStorm to support this, it’s actually very simple to setup. All we need are a few bits and pieces:
- Mocha. A testing framework for node.js. I’ve been using it for some time and it’s quite decent. It’s from the same guys that have brought us ExpressJS. There are alternatives such as Vows, and much of what I explain here will work with others too.
- Nodemon. This is a pretty sweet file monitor for node.js applications by Remy Sharp. Basically the way it works is that it wraps your node.js application and then sits monitoring a folder, where you source files are located. As soon as it detects a change, it re-launches your application.
Getting it working on the command line
Note: All instructions I’m giving are for MacOSX. If you’re running node.js and WebStorm on Windows, the same things should apply except where explicitly indicated (although I’ve not tested it on Windows).
The first step is to make sure things are working on the command line. Mocha can be installed globally or locally. The instructions here are assuming a local install of mocha. For this, in your project folder type:
Next step is to install nodemon. This one you can install globally
If everything has installed correctly, you should now be able to run it
A few things to take into account:
- By default, nodemon is going to monitor the current folder, as such, we do not need to indicate the –w parameter.
- mocha automatically runs tests located in a folder called test. If you want to apply this to another folder or specific tests, then you can just pass them as a parameter after the mocha.
Running under WebStorm
Once that’s running, the next step is setting it up in WebStorm to have all this in one place.
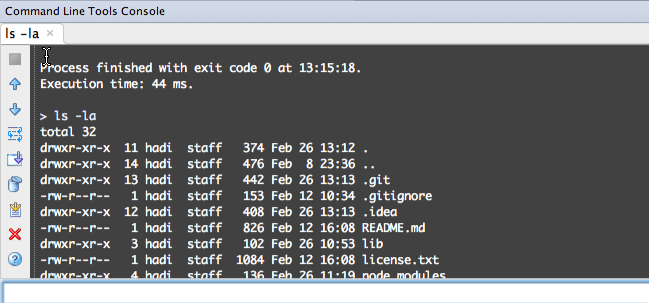
As I mentioned, WebStorm does not ship out of the box with this kind of functionality. However, what it does provide is great Command Line tool functionality. Under the Tools menu, there is a Run Command… which allows us to run any command and have the output displayed inside a tool window:
Here is the output of running ls –la
It’s pretty obvious what the next step is to run
nodemon node_modules/mocha/bin/mocha
and it should work, but it doesn’t. You’ll get the following error:
env: node: No such file or directoy
Reason for this is that when running GUI applications under MacOSX, the environment variables are not the same as those when you run a from a terminal. In particular, node for instance is not on the path. To overcome this issue, you can either launch WebStorm from the terminal (yuck!) or solve it. Fortunately this isn’t as hard as it once was. Here’s a Tip on our forum for RubyMine but it applies to all IDE’s including WebStorm. In essence, its creating an environment.plist file inside ~/.MacOSX which contains your full path. Mine is here if you want to download it. Make sure you reboot your machine after doing this step.
Setting up an alias
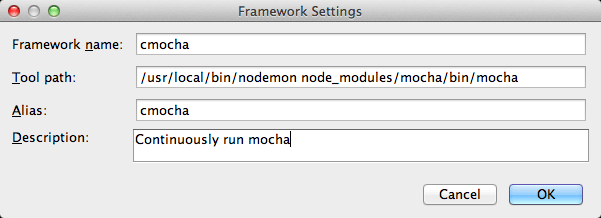
Everything should be working now, but instead of having to type this in each time, lets set up an alias for it in WebStorm. Click on Preferences (CMD+, under MacOSX) and type in Command to get to the command line tools. Click on the + button to create a new entry and confirm the dialog box to create a new custom framework. Here are my entries:
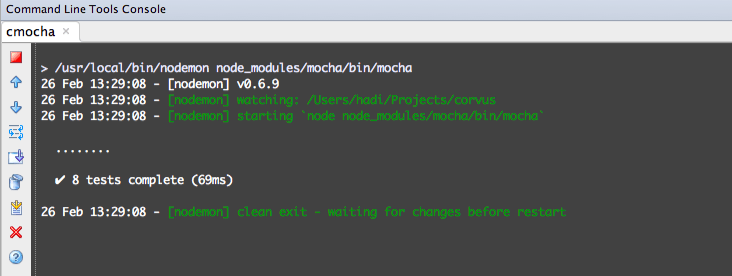
We’re done. Only thing left to do is run it. Go back to Tool | Run Command and type cmocha
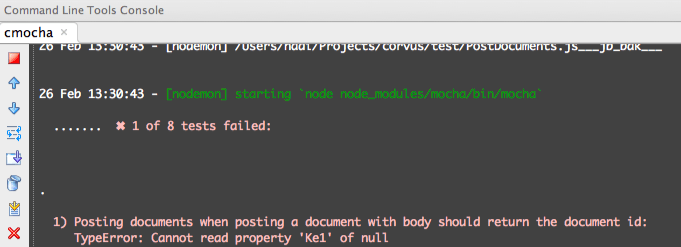
Now as soon as you make a change to the file and save it, you’ll instantly see if any tests have failed:
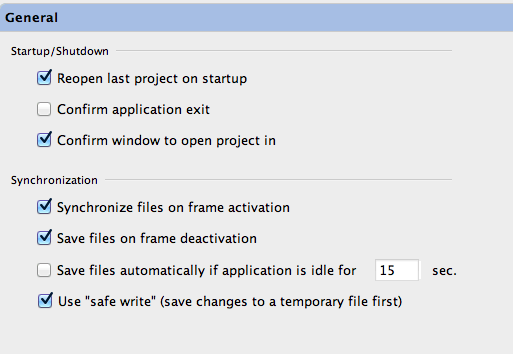
You can take it one step further and combine this with WebStorm auto-save features:
and now have your tests run constantly! Whenever you want to stop it, just click on the red square or merely close the tool window
I’ve shown you how to do this with mocha but as I mentioned, it should work with other testing frameworks such as vows. You can also pass parameters to mocha to change the reporting style of the test output etc. but for purposes of continuous testing, none of that is really required. Simply seeing if everything has passed or the failing tests is sufficient.


