Last updated: 07 January, 2014
- Why this Guide
- The Basics
- Project Formats
- Creating a new Project
- Working with Maven and Gradle Projects
- Sharing Projects with Eclipse
- Project Settings
- Building Projects
- Running Applications
- Debugging Applications
- Unit Testing
- Completion
- Navigation
- Code Analysis
- Refactoring
- Version Control
- Tools
- Configuration
- Editing
- Plugins
- IntelliJ IDEA For Eclipse Users
- Change Log
Why this Guide
Much like its counterpart, the JVM Guide the purpose of this guide is to make it easier for newbies to get up to speed faster with IntelliJ IDEA.
Work in progress
While it is a blog post, it is also a page that I will update as and when I come across new things. At the top is the latest updated date.
Target Audience
This guide is for anyone starting out on IntelliJ IDEA. Some comparisons are made with Visual Studio, so if you’re familiar with .NET and Visual Studio, you’ll feel right at home.
What this guide is not
This guide is not meant to replace the documentation for IntelliJ IDEA or the many tutorials available. When appropriate this guide links to help and tutorials available.
The Basics
IntelliJ IDEA is a full-fledged IDE with all the things you’d come to expect from one including:
- Intellisense and Code Completion
- Coding Helpers
- Code Analysis
- Navigation
- Refactoring
- Debugging
- Source Control Integration
- Unit Testing and Code Coverage
- Code Formatting
- Build Management
- Continuous Integration support
- Other Tooling and Features
Cross Platform
IntelliJ IDEA is cross-platform. It run on Java, which means you can run it on Windows, OSX and Linux. You can use either Oracle’s JVM distribution or OpenJDK (except OpenJDK 6).
Multiple Languages and Technologies
IntelliJ IDEA is not just a Java IDE, where Java refers to Java the language. There are dozens of plugins for multiple languages including Clojure, Scala, Kotlin, Go, HTML, JavaScript, etc. Some of these plugins are developed by JetBrains, others by the community.
You can use IntelliJ IDEA to even develop web applications that are built using HTML and JavaScript and have nothing to do with Java. Although in these cases, it’s recommended that you use WebStorm (if you don’t need JVM technology).
In addition to languages, it supports an array of technologies and frameworks such as Spring, Android, Java EE, et al.
Extensible
A lot of the features in IntelliJ IDEA are plugins. Some are bundled, others can be downloaded from the plugin repository. There are over 1000 plugins available.
You can also build your own plugins for IntelliJ IDEA.
Community Edition or Ultimate Edition?
IntelliJ IDEA comes in two flavors:
- Community Edition - Free and OSS. Includes Android Development.
- Ultimate Edition - Commercial product.
Ultimate builds on top of Community Edition, adding some features. See full comparison.
IntelliJ IDEA or Android Studio?
Android Studio is a Google product that is built on top of IntelliJ IDEA Community Edition. It is also free and OSS but is maintained by Google, not JetBrains. If you’re doing only Android development and want to adopt Google’s release cycle, use Android Studio. If you’re doing other types of development, be it JVM, Web, etc. then you’re best bet is to use IntelliJ IDEA.
WebStorm, PyCharm, RubyMine, PhpStorm, AppCode or IntelliJ IDEA?
JetBrains provides specialized IDE’s which are more focused around a specific language and/or technology. These are:
- WebStorm: For JavaScript and general Web
- PyCharm: Python, Django, etc.
- RubyMine: Ruby and Rails
- PhpStorm: PHP
- AppCode: Objective-C
All of them are based on the same platform: IntelliJ IDEA Platform. If you are doing JVM Development, you need IntelliJ IDEA. Otherwise pick the IDE that’s most appropriate for you. All the functionality included in each of these individual IDE’s (with the exception of AppCode), are also available in IntellIJ IDEA, some ship out of the box, others you can download as plugins.
The release cycles for IntelliJ IDEA and other IDE’s vary though.
Project Formats
When working with IntelliJ IDEA you have various options on how you want to deal with projects. You can use IntelliJ IDEA’s own format or use Maven/Gradle projects.
IntelliJ IDEA Projects
Modules and Libraries
An IntelliJ IDEA Project is similar to a Visual Studio Solution and can consist of modules and libraries:
- Module: A discrete unit of functionality that can be compiled, debugged, tested independently. Think of them as Projects in Visual Studio. Configuration information for a module is stored in a file with extensions .iml. Each module inside the project has its own .iml file.
- Libraries: An archive of compiled code (i.e. JAR) that a module can depend on.
A single IntellIJ project can consist of one or more modules and/or libraries.
Storage Format
IntelliJ Projects can be persisted in two ways:
- Project File (Legacy): Project information is stored in a file with extension .ipr.
- Directory Based (Recommended): Project information is stored in a folder called .idea in the main root of the project folder.
More information about projects and storage formats
Maven Projects
IntelliJ IDEA can also work with Maven modules. You can either import existing Maven modules or create a new one.
Gradle Projects
IntelliJ IDEA can also work with Gradle projects. Much like Maven, you can also create a new one or import an existing one.
Files to check-in to Version Control
When working with Version Control, you should check in all files in the project folder, including the .idea folder (when using directory based approach), except for the workspace.xml and tasks.xml files. See Serge’s explanation for more information
Creating a new Project
-
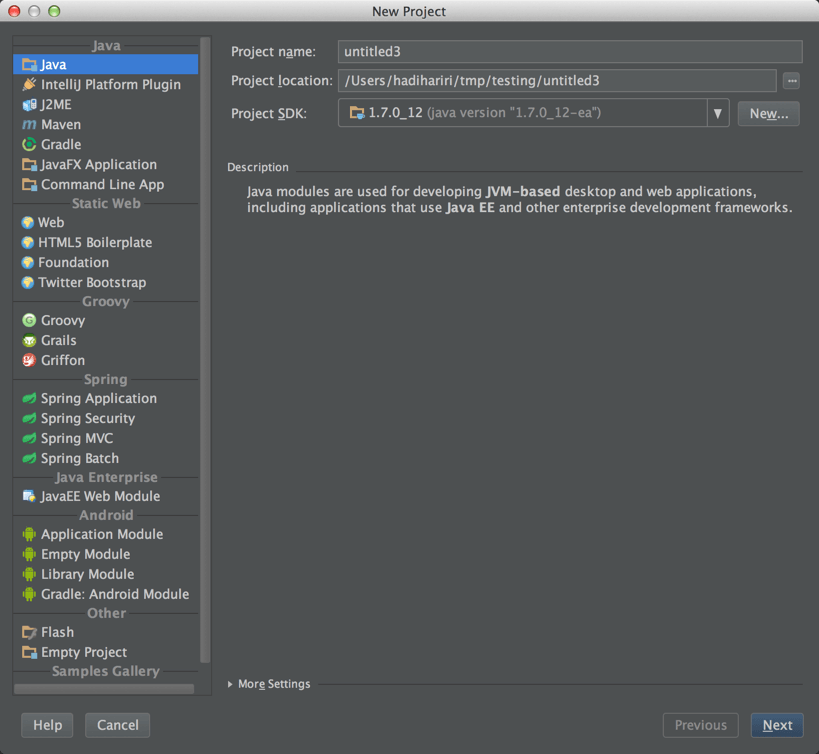
Click on File | New Project
-
Select the type of module. The most basic one is Java, independently of the language you’re going to use. Remember, IntelliJ IDEA is multi-language so in essence you can have multiple languages in the same module. The other options are technology specific. So for instance, Android will create an Android application, Spring will create a Spring application, et al.
-
Select the SDK. Usually you’d pick a JDK here (or Android SDK). This is equivalent to selecting the target .NET framework in Visual Studio. If you don’t have anything available in the dropdown, it’s because you don’t have a JDK IntelliJ IDEA knows about. Click New and add one, which means: point to the installation folder of the JDK. You can also add other types of SDK’s such as Android or IntelliJ IDEA Plugin SDK.
-
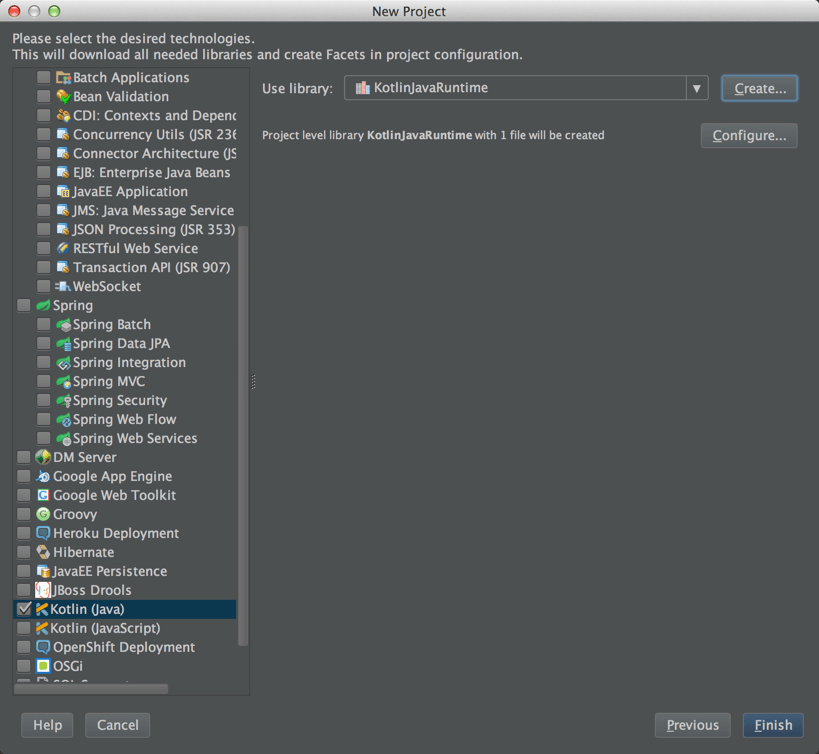
On clicking Next, you have the chance to pick the technologies you want included in the module. This means ultimately adding library references or support for specific languages. For instance, when working with Kotlin, I pick Kotlin at this stage (albeit IntelliJ IDEA can also detect new Kotlin files and add support automatically). You can pick things like Java EE support, Heroku Development, etc.
-
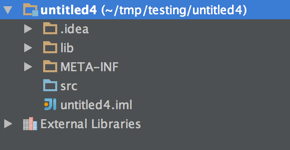
Click Finish. You should now end up with a new Project and module
Adding new Modules to existing projects
If you want to add a second module (think C#/VB project) to the project:
-
Click on File | New Module
-
Repeat steps 2 to 5 from Creating a new Project
Working with Maven and Gradle Projects
You can create and import existing Maven or Gradle projects into IntelliJ IDEA. If it’s a new project, select Maven/Gradle in Step 2 of Creating a new Project. If it’s an existing project, select File | Import Module or Import Module from the main welcome window and point to the corresponding pom.xml file for Maven or build.gradle for Gradle.
Once you do this, IntelliJ IDEA will automatically provide you with a tool window to handle Maven/Gradle.
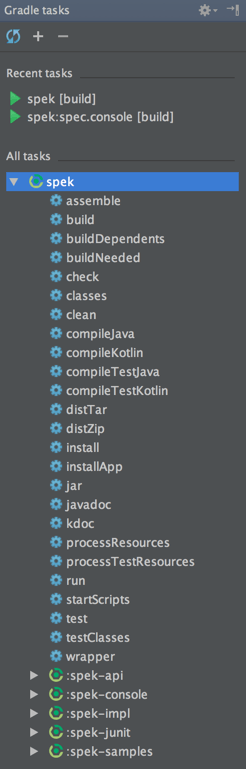
Gradle
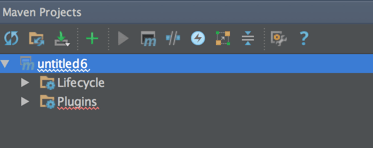
Maven
Sharing Projects with Eclipse
If some members of your team are using Eclipse, you can still use IntelliJ IDEA and have two-sync. See the Eclipse FAQ for IntelliJ IDEA users.
Project Settings
This one can be a bit overwhelming when you first open it.
Project Setting Tab
This contains information global to all modules, that is the project name, SDK and if applicable language level. In addition you can set the output compilation folder.
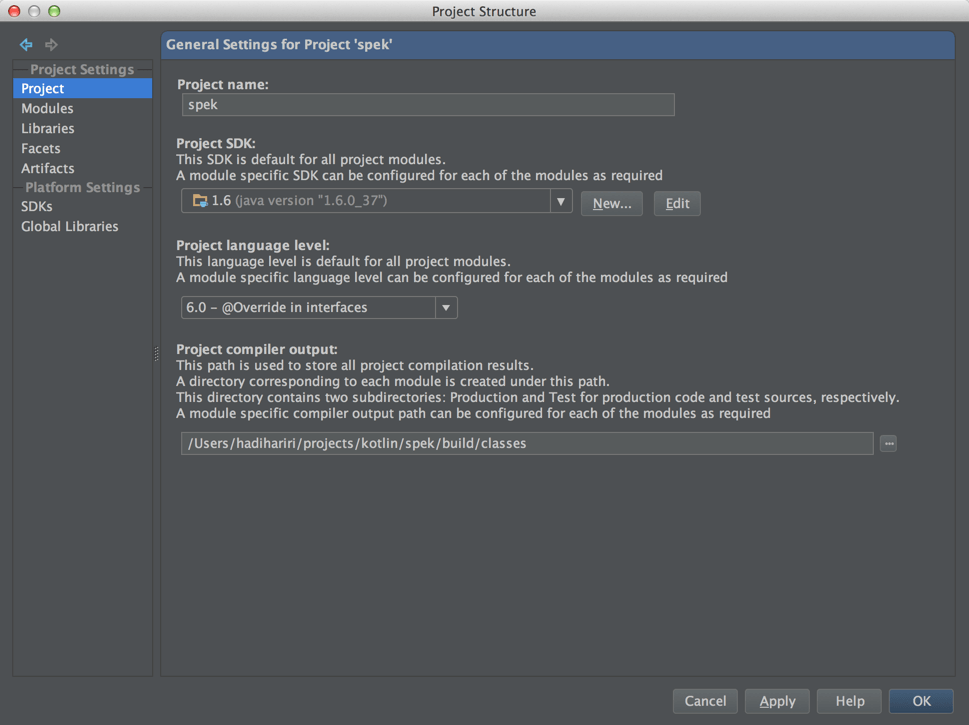
- SDK: As mention previously, this is like the .NET Framework we’re targeting.
- Language Level: In IntelliJ IDEA you can pick the language version you want to target. This is different to Visual Studio whereby each version has its own associated version of the compiler.
Module Entries
Each module has its own entry with its own settings. Clicking on Modules we can see each entry on the right pane.
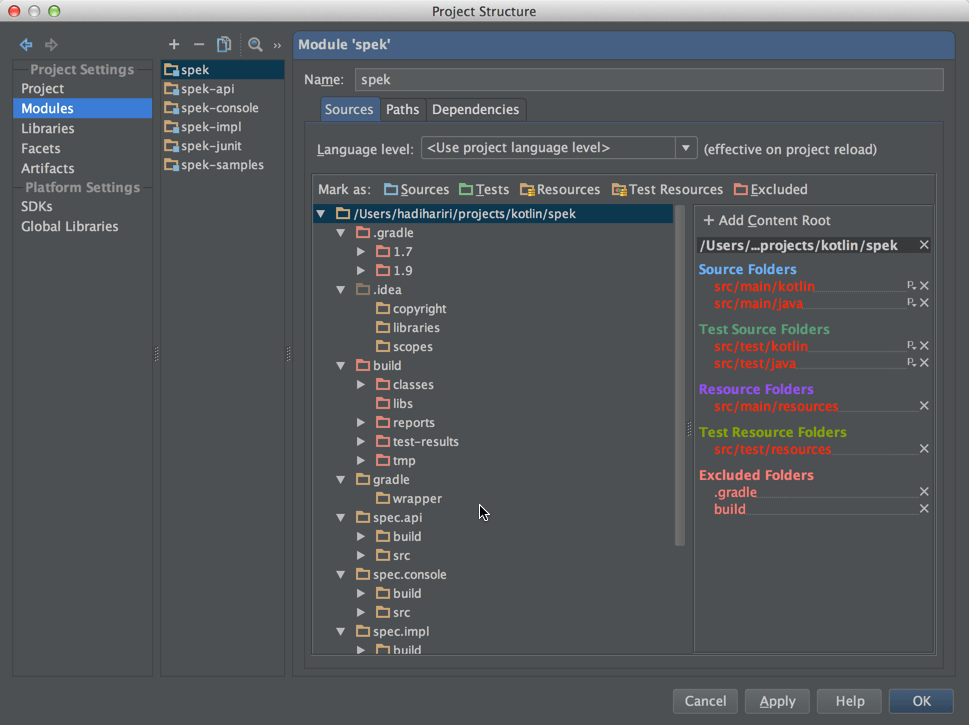
The buttons at the top (+/-/Copy) allow you to add/remove and copy modules directly from this page.
Sources
There are some folders in IntelliJ IDEA that have a special meaning, namely
- Source Folders
- Test Folders
- Resources
- Test Resources
then there’s Excluded Folders.
This is where you can mark what is what. Right-click and select. You can also do this from the Project Window.
Usually when creating a new project, src is automatically marked as a src folder. Folders such as out are excluded.
See Sources Tab for more detailed information
Paths
This one is pretty straight-forward. You can override the default project settings and specify different paths. You can also manage JavaDoc lookups and Annotations.
Dependencies
This is where you specify your module dependencies (i.e. other things you rely on). A dependency can be:
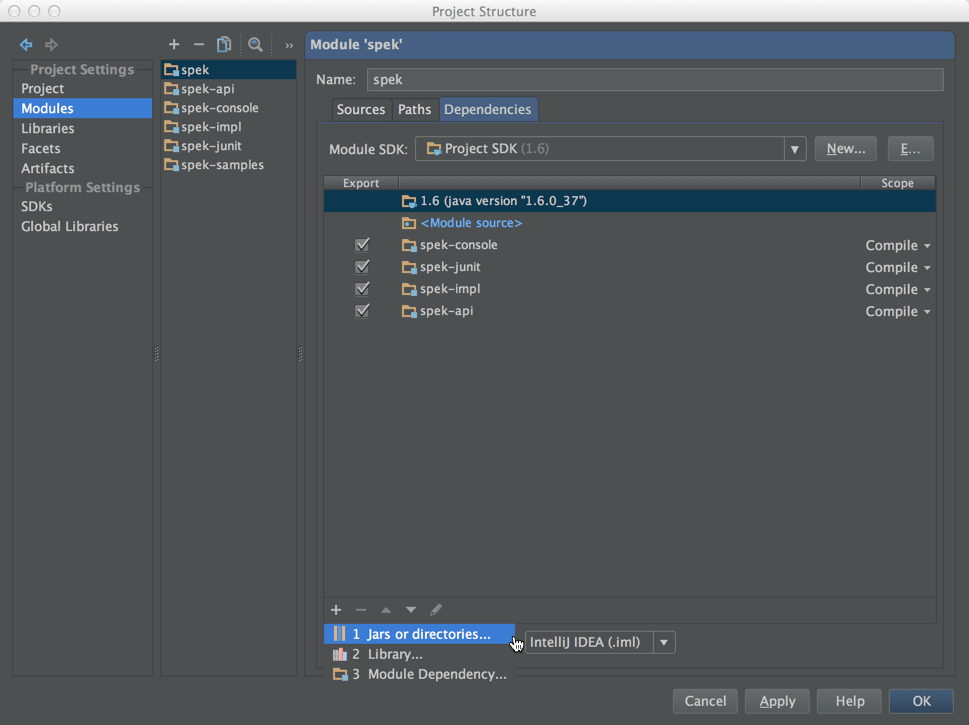
- A JAR or directory containing classes
- A Library
- Another module in the project
Wondering about Maven dependencies? Wait till we get to Libraries, which is next!
Libraries
This is where you can reference external modules. IntelliJ IDEA defines these as libraries. A library can be a Maven library or a JAR directory with its class files, sources and docs.
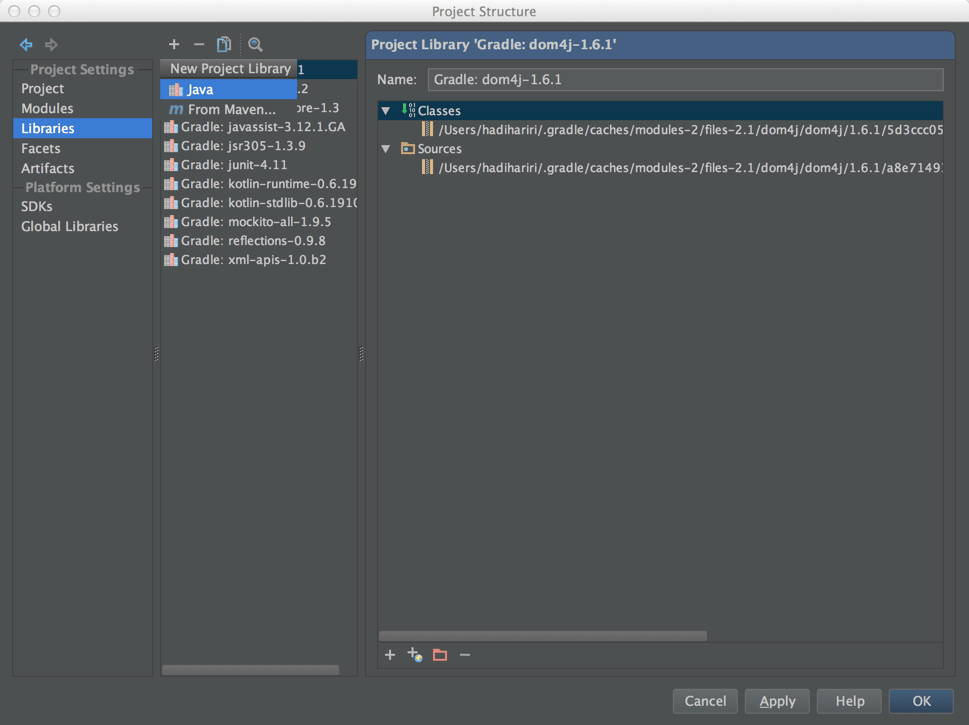
You can also add additional directories (or remove them) from existing libraries (right pane).
See Configuring Module Dependencies and Libraries.
Facets
Frameworks such as Spring require certain configurations, libraries, dependencies and technologies. A Facet is a way to group all this into a manageable component that is then used by IntelliJ IDEA. You can add Facets here. For instance, when creating a Spring module with a new project, it adds the Spring Facet.
For more information about Facets see the documentation
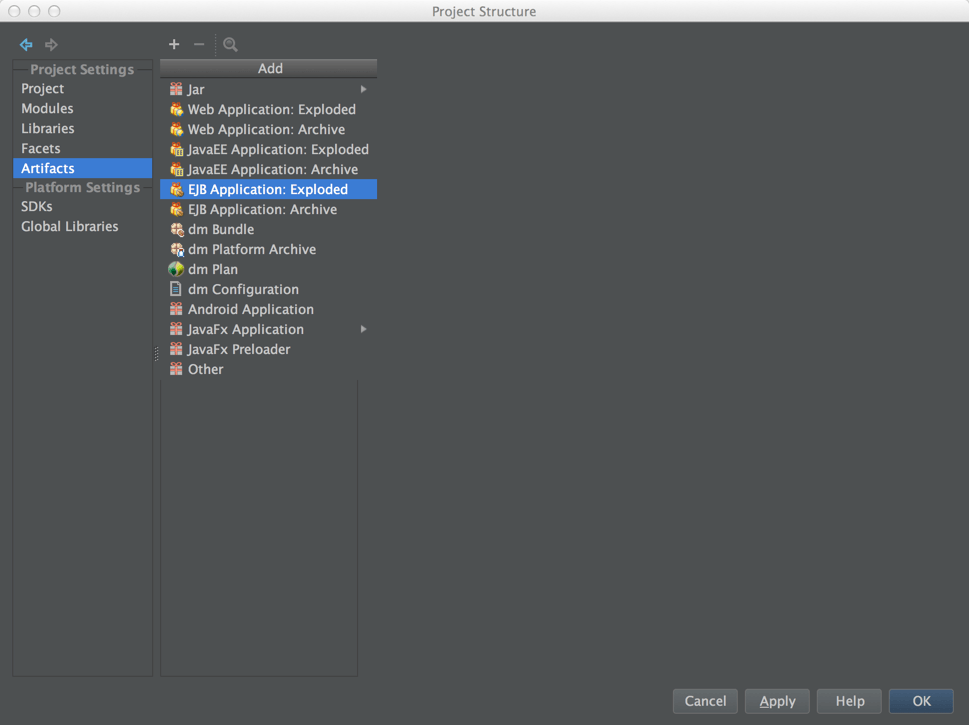
Artifacts
Artifacts, or otherwise known as output generated by your project. This is where you tell IntelliJ IDEA to create JAR’s, WAR’s and other types of artifacts for you. Once you define them you can then access them from the Build menu.
SDK’s
These are globally available SDK’s for IntelliJ IDEA. Add and remove at will. Obviously don’t remove those required!
Global Libraries
Libraries as we saw are libraries you can use in your project, but they’re only available to your project. If you want libraries to be available globally for all projects, define them here.
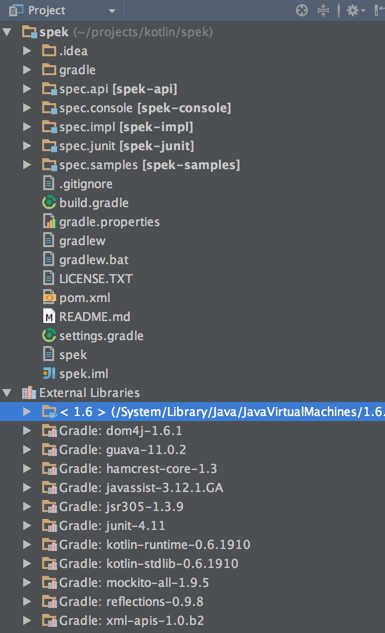
External Libraries
In the Project Window you always see an entry named External Libraries. These are libraries that are not internal to your project (i.e. other modules).
Building Projects
IntelliJ IDEA is aware of the build system you use, to the point that if you’re using Ant, Maven or Gradle you can actually have these invoke project builds. In fact, with Maven and Gradle, your project is continuously being built when changes occur.
In the case of Ant, Maven or Gradle, you can use the corresponding tool windows
However, there’s also a Build menu that has a few options:
- Compile: Compiles files in the selected scope, whether they’ve changed or not
- Make Module: Compiles module, and only recompiles files if they have changed
- Make Project: Same as Make Module but for the entire project.
- Rebuild Project: Forces a recompile of the entire project.
For more details see documentation Note: these still work even if you’re using Ant, Maven or Gradle.
I usually use Make Project (Cmd+F9 on OSX).
Running Applications
Run Configurations
IntelliJ IDEA has the concept of Run Configurations. What this means is that before you can run an app, you need to create a run configuration for it. Fortunately this is quite easy. In fact with certain types of applications, such as command line apps, you can just right-click on the main class and hit Run. IntelliJ IDEA will automatically create a run configuration for you.
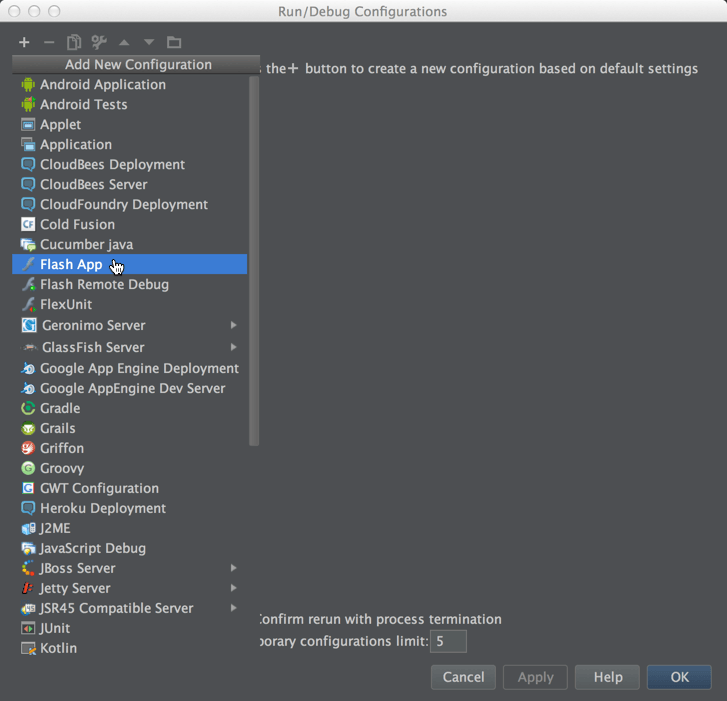
Alternatively, click on Run | Edit Configurations to create a new entry
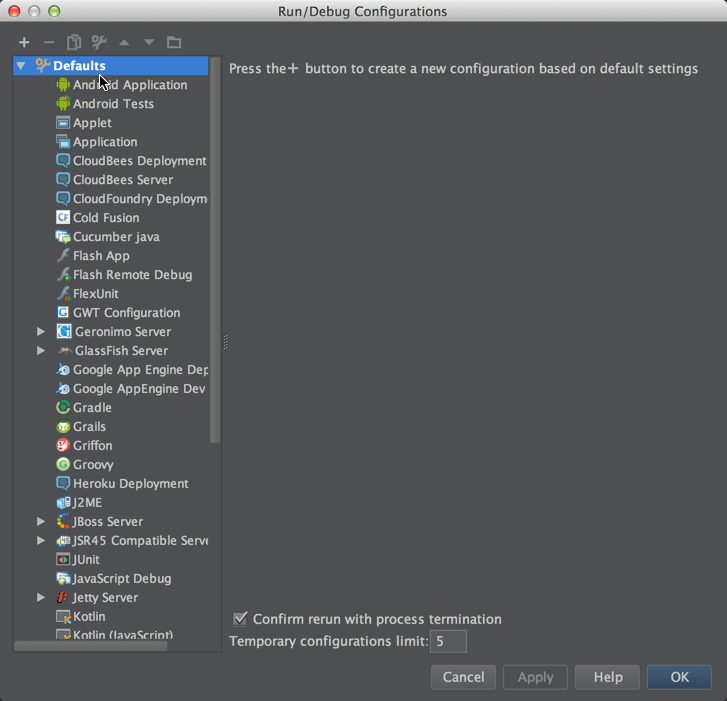
Do not modify the defaults
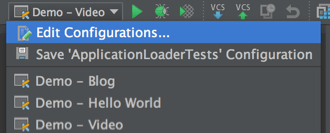
The entries you see are defaults. You don’t usually modify these. What you need to do is add a new configuration:
Once you have a Run Configuration, the Run button will be enabled. If you have more than one, you can pick the one you want from the dropdown
Debugging Applications
Just like Run Configurations, IntelliJ IDEA also provides configurations for debugging. Same principle, except you provide parameters required for debugging. See Creating and Editing Run/Debug Configurations for more information.
Much like any decent IDE, IntelliJ IDEA provides a full debugger with breakpoints, conditional breakpoints, watches, evaluations, etc. In addition it provides JavaScript debugging too (and for most languages that have a plugin available)
See Debugging for more information.
Temporary Configurations
In case you were wondering, yes, you can have temporary configurations too
Unit Testing
Running, Debugging and Code Coverage
IntelliJ IDEA ships with support for JUnit, TestNG, Groovy JUnit, FlexUnit, JSTestDriver, Jasmine out of the box, and allows you to run, debug and get code coverage for tests using any of these frameworks.
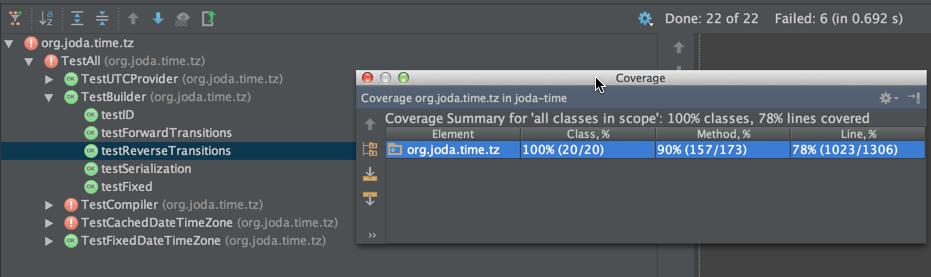
Similar to ReSharper Unit Test Runner, you can also create test sessions, run the current tests, run a scope of tests, etc.
See the Unit Testing and Code Coverage tutorial for more details
Integrating with TeamCity
// TODO
Completion
IntelliJ IDEA offers code completion, making you type less and providing you with insight into API’s.
Check out the Completion Tutorial for more information
Documentation and Parameter Info
IntelliJ IDEA supports in-place documentation and parameter information
Code Generation
File Templates are the fastest way to create new files (Cmd+Ctrl+N on OSX when inside a file or Cmd+N when in Project Window).
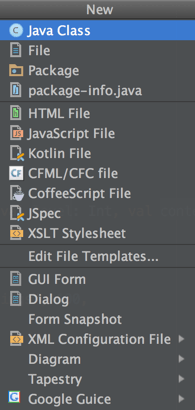
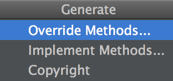
Cmd+N on a class allows you to override methods, implement methods, etc. It’s context sensitive
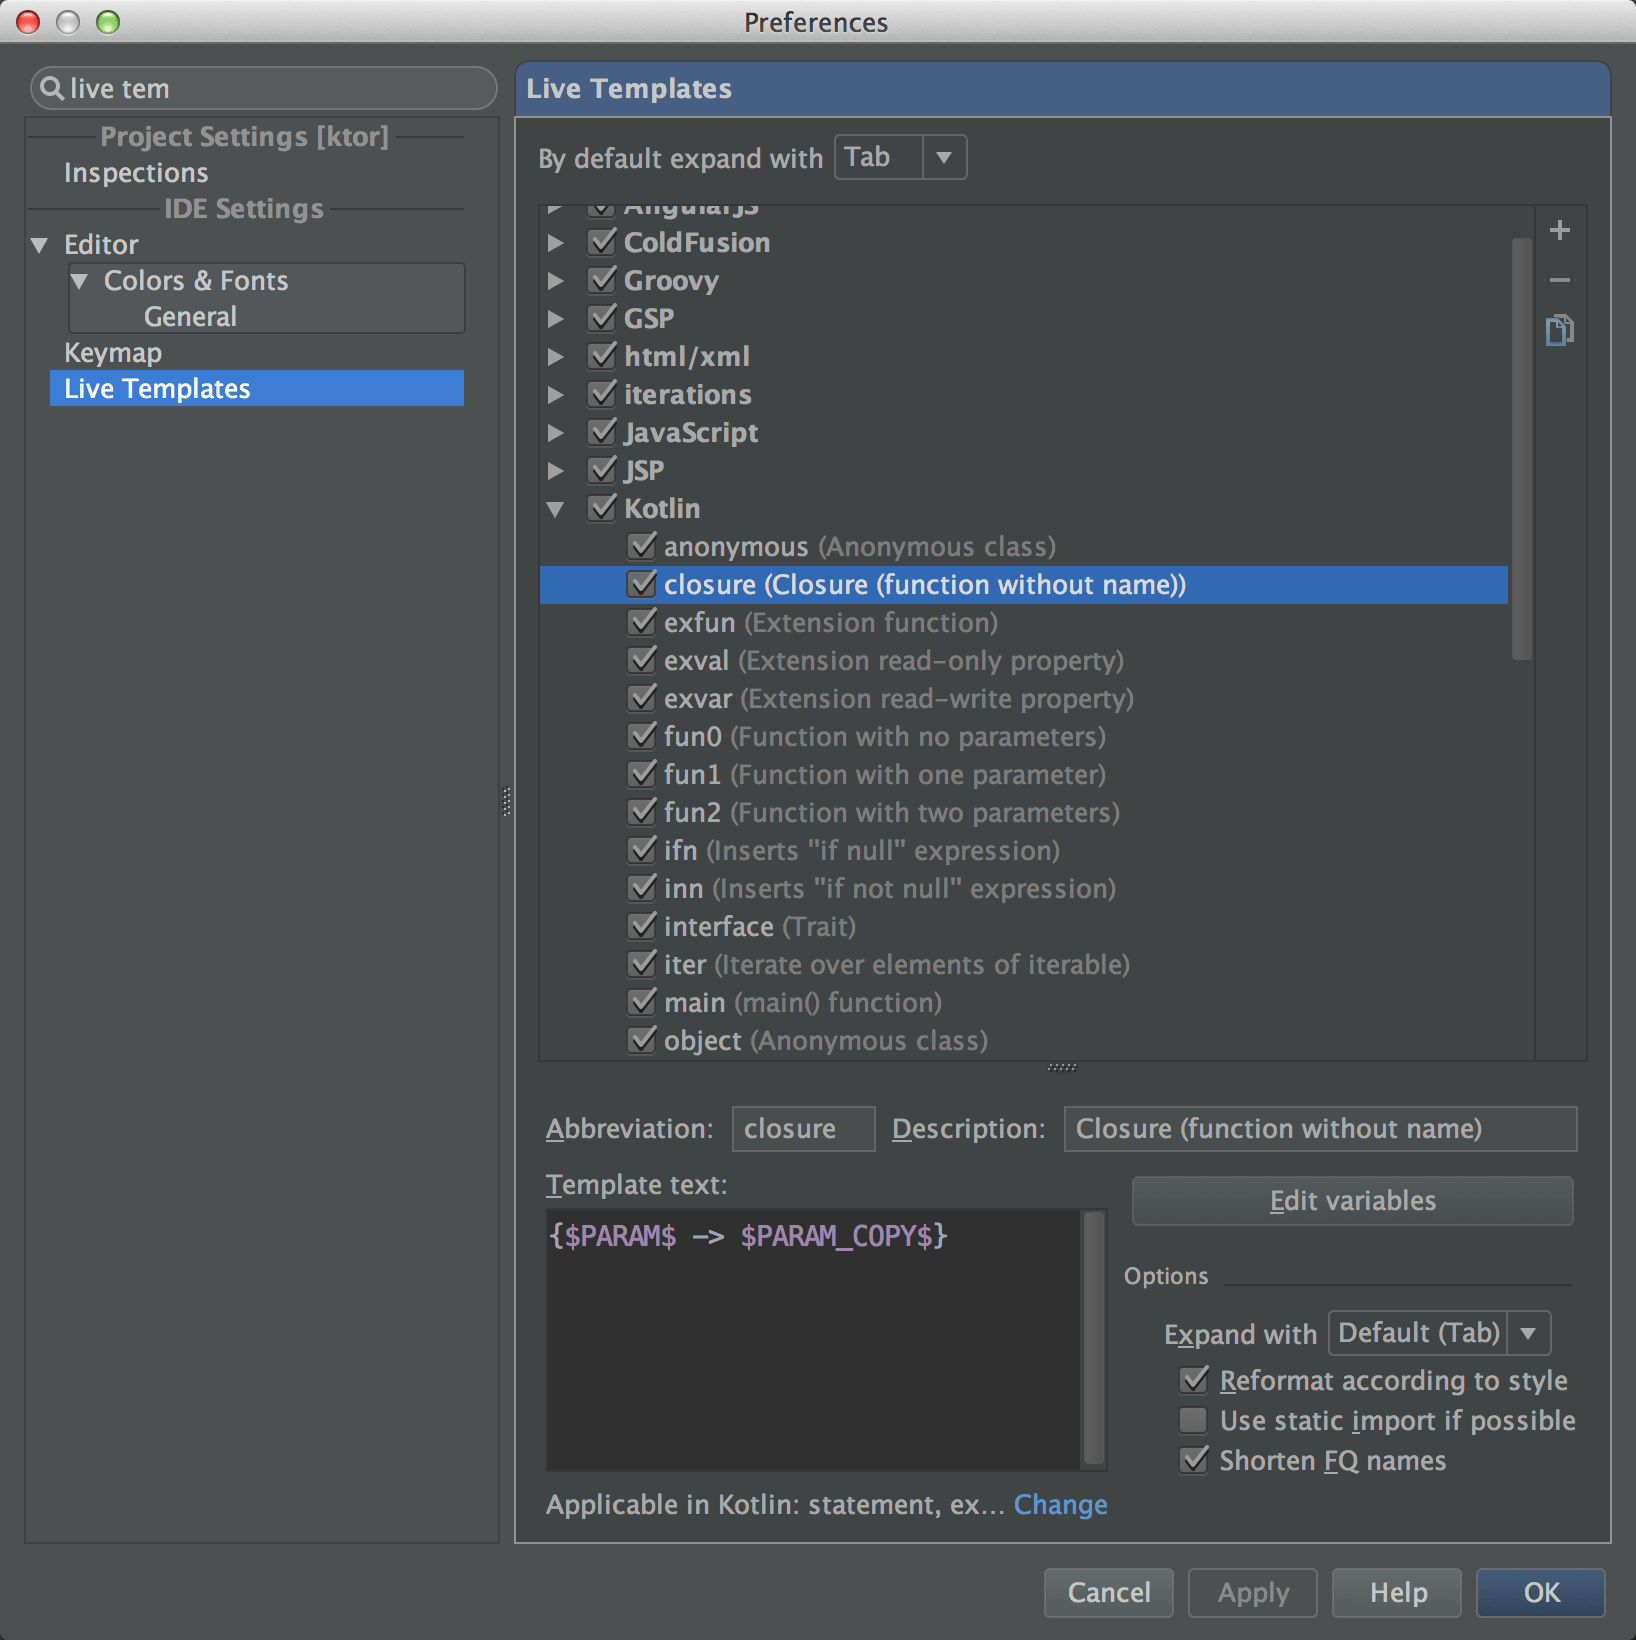
Along with File templates, you also have Live Templates which are interactive snippets. You can access them via Preferences | Live Templates
Navigation
Very rich navigation and pretty much aligned feature-wise with ReSharper. If there’s one key to remember that’s Double-Shift (IntelliJ IDEA 13+): Search Everywhere
Check out the Navigation tutorial for more information.
Code Analysis
IntelliJ IDEA sees Dead Code, a.k.a. the famous T-Shirt. It detects issues in your code (via Inspections) and offers you quick fixes (Intentions). That’s the famous Alt+Enter menu shortcut. Which btw, has its sister ReSharper T-Shirt.
The Red marks you see in the gutter are all these inspections that IntelliJ IDEA does. Don’t get scared. If you don’t agree, you can turn them off.
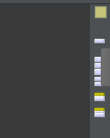
If the top square is Green, you’re all good. If it’s Yellow, there are some warnings and hints. If Red, you got a problem!
Navigate over the marks to see a preview
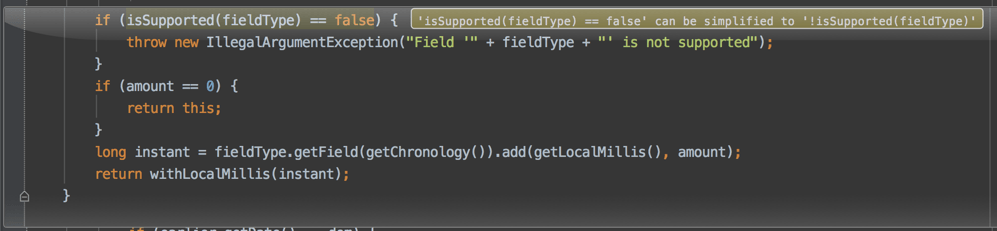
Click on them to navigate to them (you can also do this via keyboard shortcuts):
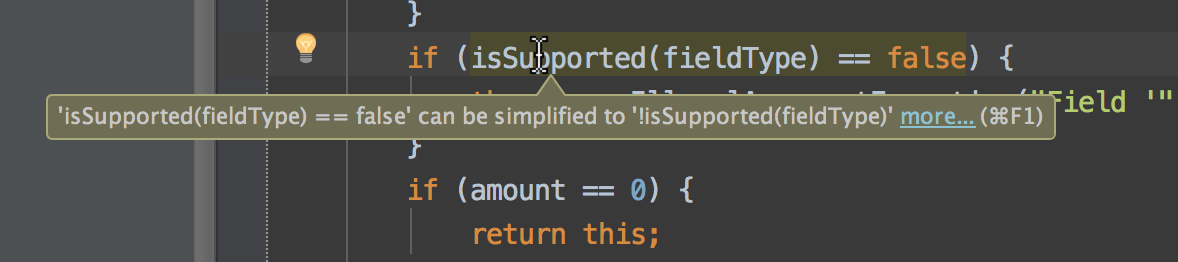
Hit Alt+Enter to see what IntelliJ IDEA offers (Intentions):
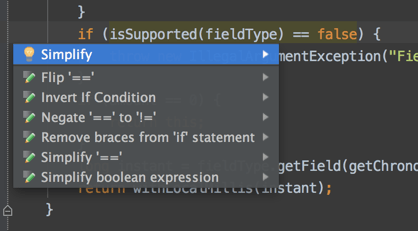
For more information see the Inspections tutorial as well as the Intentions one
Refactoring
IntelliJ IDEA was initially named Renamer, so refactoring is in the core of the product! There are too many refactorings to cover in detail, but before doing any manual refactoring, check to make sure IntelliJ IDEA doesn’t already support it
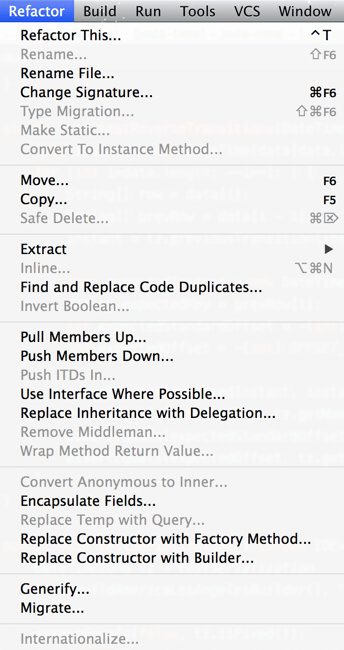
Also, note that Refactoring, much like Inspections and Navigation are language-dependent. So if some entries are missing, they’re not implemented yet for your language of choice.
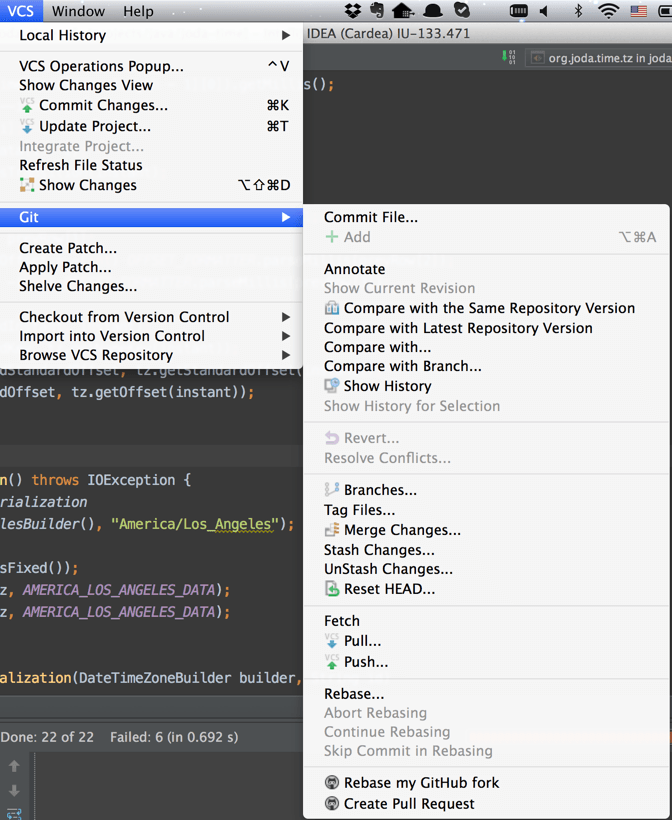
Version Control
IntelliJ IDEA supports a variety of version control systems including Git, Mercurial, Subversion, Perforce and even TFS.
You can add, delete, commit, revert, branch, push, pull, and pretty much do anything you want from inside the IDE.
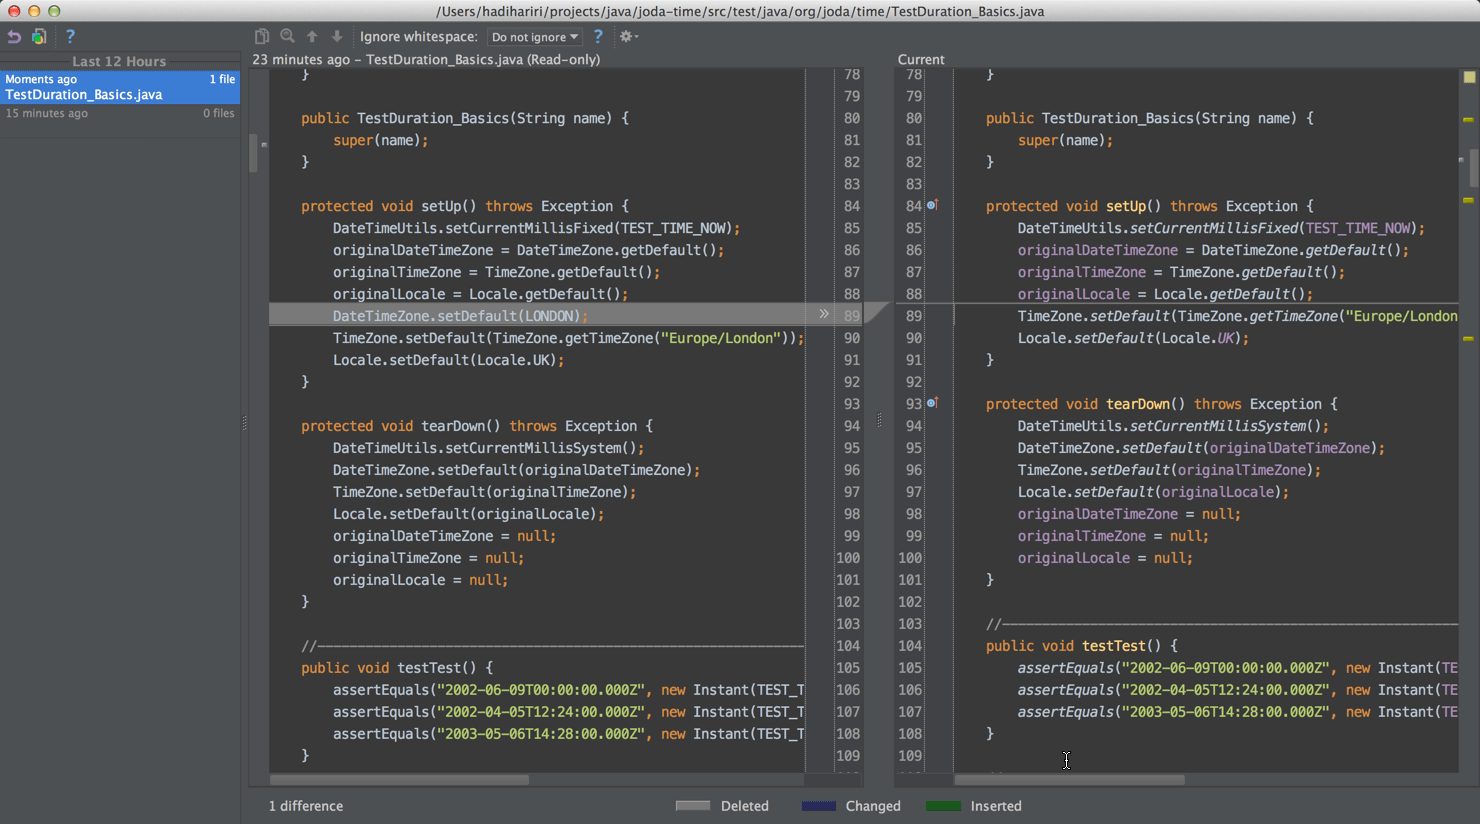
Local History
Something that can save you often is Local History. IntelliJ IDEA keeps a local history of your changes, so even if you haven’t committed or attached the project to version control, you can still benefit from being able to rollback changes.
Tools
IntelliJ IDEA comes with a series of frequently used tools. Too many to cover in this guide in one go but here are some important ones you might need:
Terminal
Just launch the Tools | Terminal and you have complete shell access from inside the IDE
REST Client
Want to talk to your HTTP servers? Issue POST/PUT/DELETE or JSON even? Use the built-in Test RESTful Web Service.
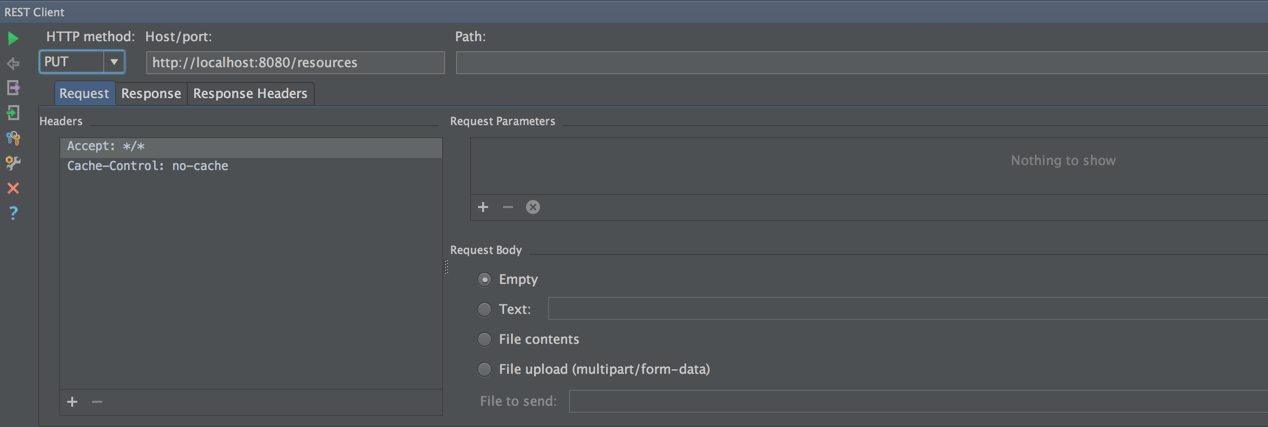
See this tutorial from PhpStorm for more information. Or watch this video.
Note: This, and many other features and tools of IntelliJ IDEA are part of the core platform so they are available in all the different JetBrains IDE products.
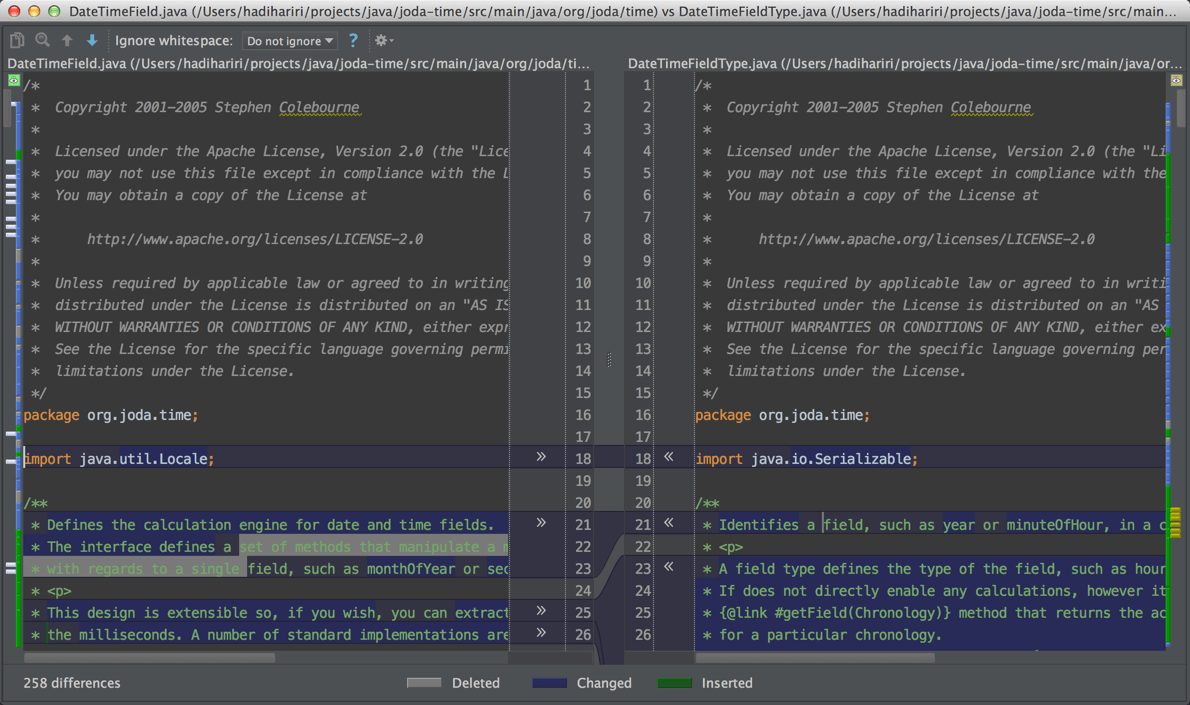
File Comparisons
Same as you can do with Local History, you can select two files and compare them, as well as edit in place. Just select the two files in the Project Window, right-click and Compare files
Database Tools
Want to talk to a SQL Database? Just use the built-in database tools. (this post is a bit outdated as it’s now much easier to set up new connections. No need to specify JDBC string anymore).
Configuration
IntelliJ IDEA is extremely configurable and you’ll discover features as you use it more. It would be impossible to cover every aspect in this guide, but a couple of hints:
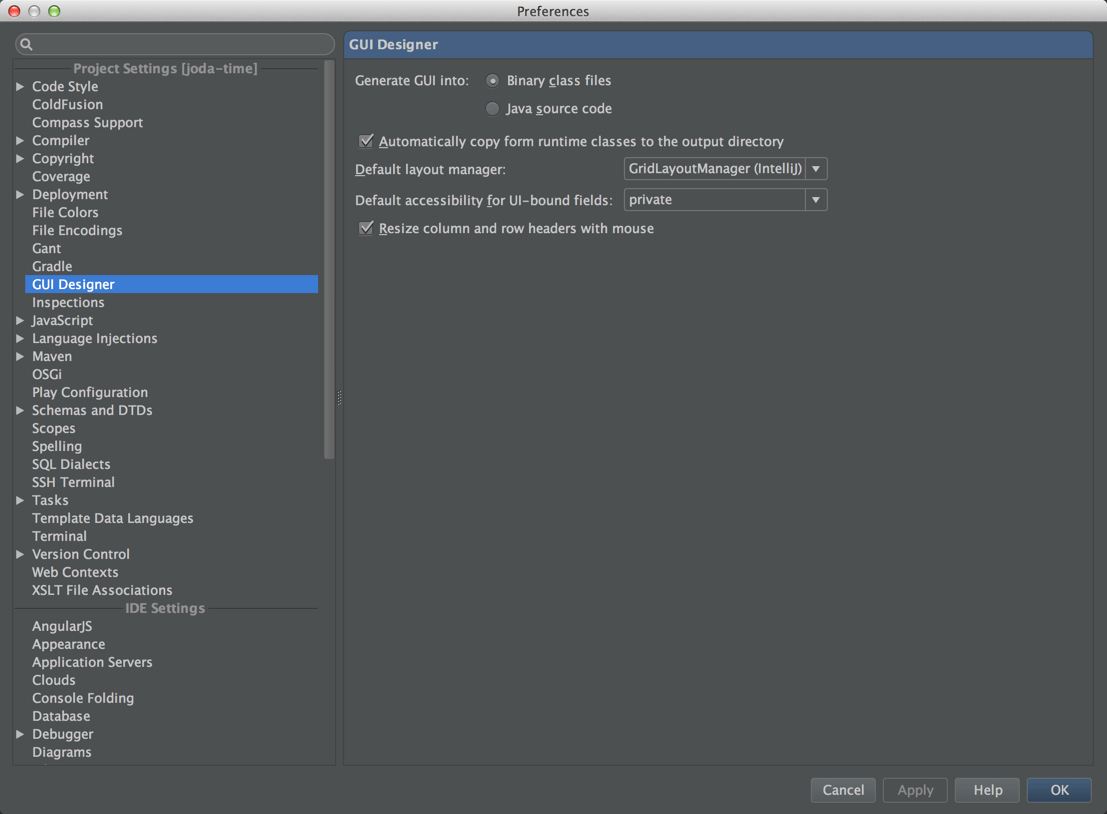
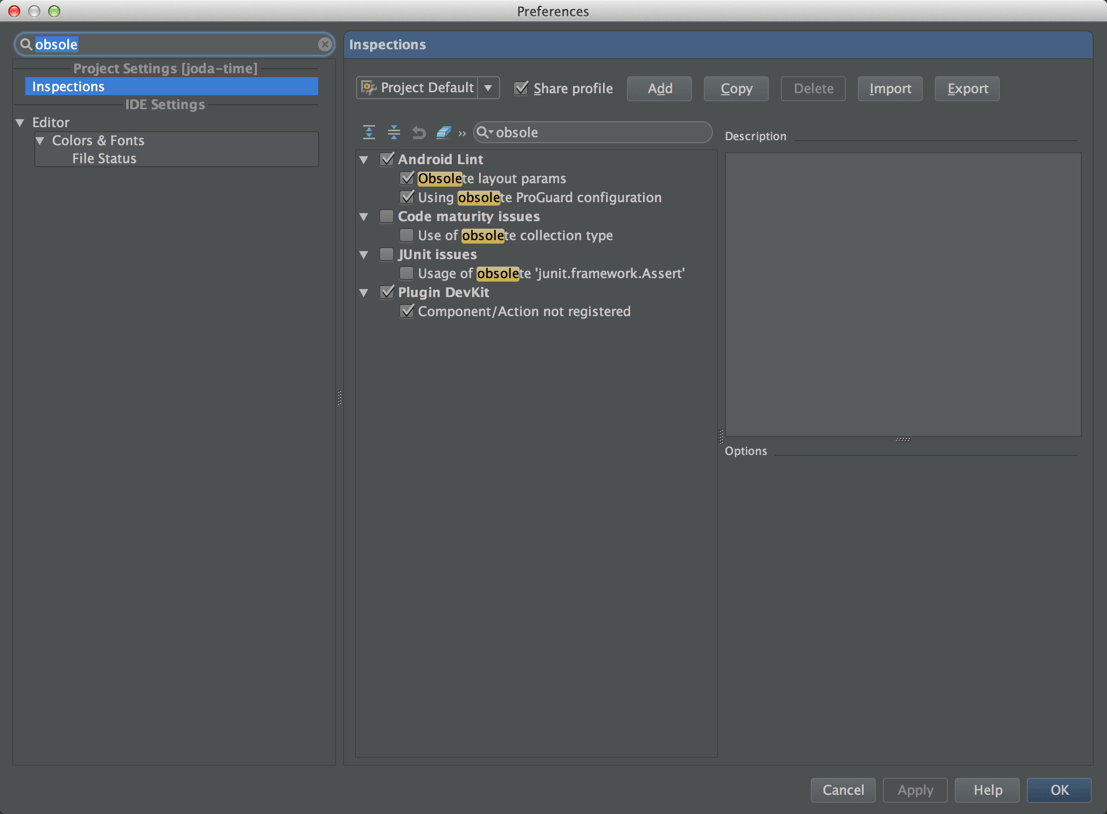
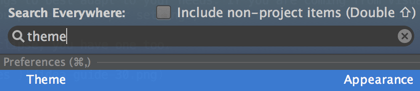
Do not sit looking through pages and tabs of configuration, just open up the dialog box and start typing. There’s a quick find. For instance, want to go to change inspection settings for obsolete code, start typing ‘obsol…’
Importing and Exporting Settings
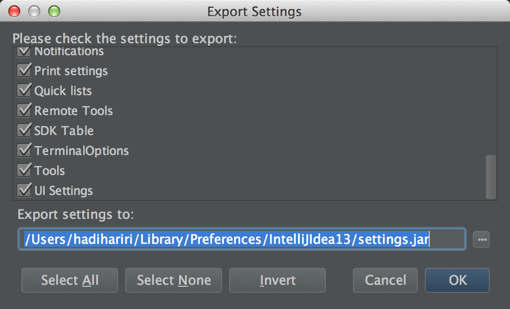
To import and export settings use File | Import Settings and File | Export Settings respectively. Settings are saved as .jar files. All settings, be it keyboard mappings, templates, fonts, colors are all saved in the same file. You can pick what you want to import/export.
Key Bindings and Schemes
Configure the key bindings to best adapt to your needs. If you are coming from Visual Studio and using ReSharper with IntelliJ IDEA or ReSharper 2.x key mapping, there’s an option available for you. If you prefer ReSharper settings, I’ve created a file (although I no longer maintain) with these mappings.
If you’re coming from Eclipse, you have one too.
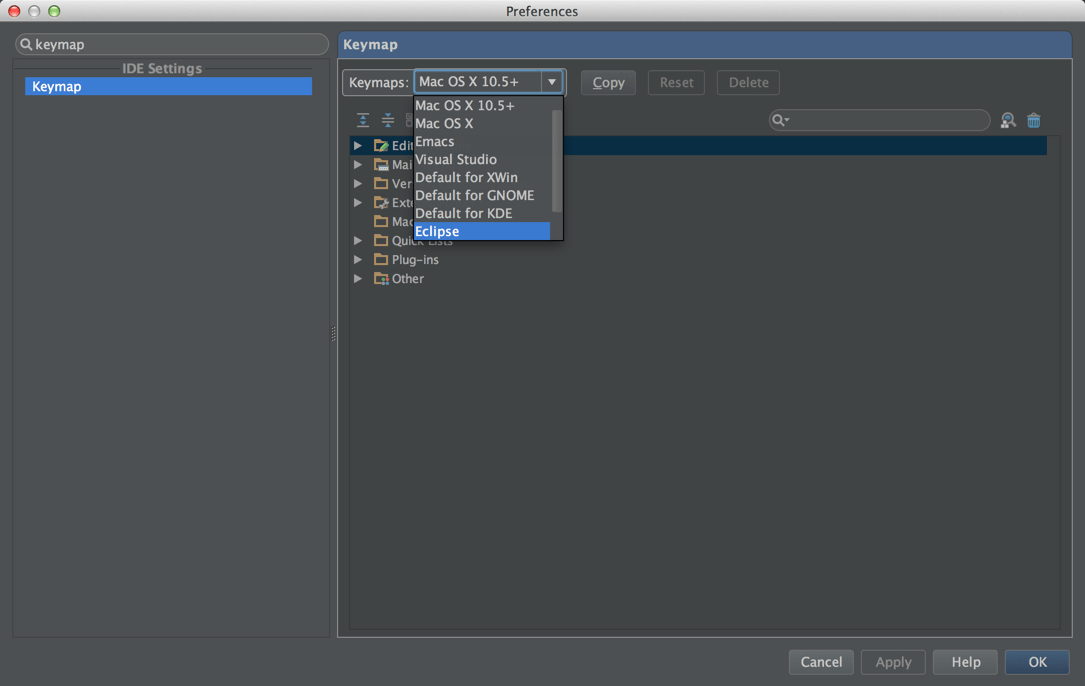
Personally I try and adapt to a new environment learning the settings for that one. On Mac I use the default Mac OSX+ keymap scheme.
Fonts, Colors and Theme
I use Darcula theme with my own font size. You can change it to your needs. But remember, you need to first Save the scheme to a new name before you can change it.

Remember these two keyboard shortcuts
If all else fails remember:
-
Double Shift: Search everywhere. And I really mean everywhere. Even settings.
-
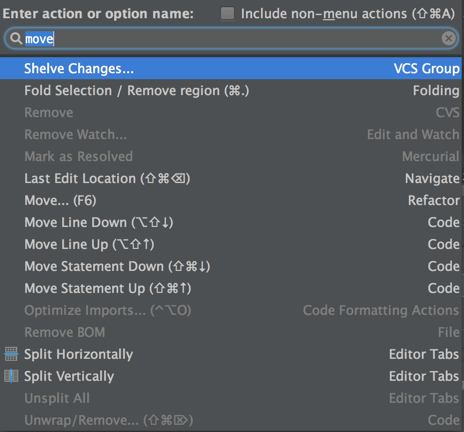
Cmd+Shift+A: Can’t remember a keyboard shortcut or menu entry? Start looking for it
Editing
No Save
You don’t need to save files in IntelliJ IDEA. It automatically does so.
Plugins
Over 1000 plugins so too many to even consider mentioning here. You can either browse or search for them via the browser on the JetBrains plugin site or directly from inside IntelliJ IDEA
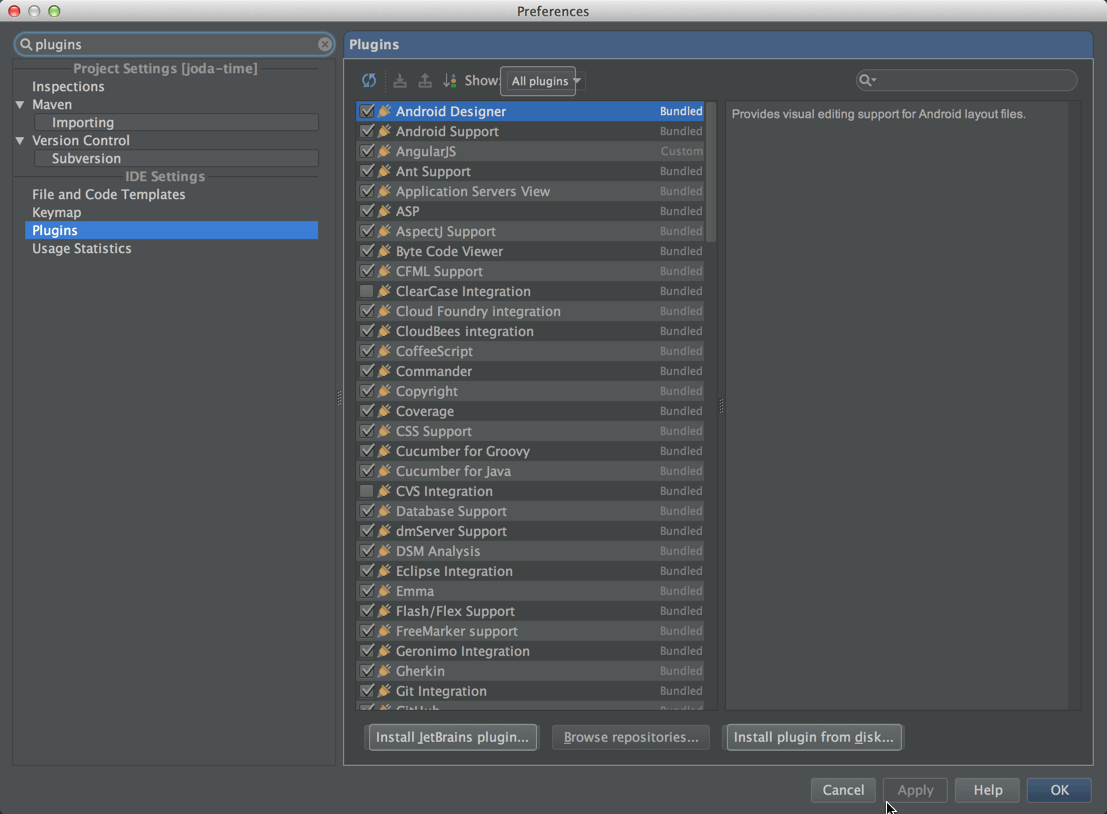
You can install plugins from:
- JetBrains Plugins: These are plugins created and maintained by JetBrains (i.e. official)
- Browse Repositories: By default points to plugins.jetbrains.com but you can point to other repositories too.
- Install plugin from disk: Point to a zip file (plugins ship as zip files)
You can also of course create your own plugins.
And while I can’t mention any because there are way too many cool ones, for VIM lovers, there’s IDEAVim which gives you a somewhat Vim experience inside IntelliJ IDEA.
IntelliJ IDEA For Eclipse Users
Anton from Zeroturnaround has written an awesome and complete guide for IntelliJ IDEA users coming from Eclipse. Highly recommended if it’s your case. And still recommended even if you’re not coming from Eclipse as it contains a ton of tips and tricks.
Change Log
Tracks changes made to this guide.
| Date | Change |
|---|---|
| 06th Jan 2014 | First Draft Published |
| 07th Jan 2014 | Fixed typo’s |
| 12th Feb 2014 | Added IntelliJ for Eclipse Users |