I know, the title is cringeworthy. In fact the only thing worse is using a subtitle
“with only one line of code”
But allow me to indulge somewhat, because it really is accurate if one were to consider my knowledge of AWS Lambdas, Terraform, and AWS in general as somewhat zero. I mean sure, I know what they are, but I’ve not really played with them that much in the past.
Today, I managed to create a new AWS account, set up my credentials, write a function in Kotlin and deploy it to AWS without even having to open up a single Terraform file. And all with Kotless.
In this post I’m going to walk you through the process. Using Kotless and deploying is in fact the smallest part of the entire thing. Most of this post is about setting up an AWS account and credentials, as well as my very superficial explanation of serverless. If you know all that, just skip right ahead to Writing our function.
What is Serverless?
I’m pretty sure Wikipedia will offer you a much better definition than I can, but in its simplest form, imagine you want to run a function in the cloud without the overhead of having to have an HTTP application or set-up Docker, or anything else. You just want to run a simple Kotlin function, something like:
fun sayHello() = "Say Hello!"
which would respond to an endpoint /hello.
Different technologies allow you to do that, including AWS Lambdas, Google Cloud Functions, as well as Azure Functions. And with the majority of them you can use their web control panel to write some function and deploy it. But we all know that in real-world applications, you’re not using GUIs to write and deploy apps!
Terraform Galore
So what do you do in the real world? You write Terraform files to deploy your functions. And you don’t just write one, you write a lot! And the more functions, the more you need. The more resources you use (databases, files, etc.), the more complex these become.
But what’s more, if you look through most of these configurations, they’re somewhat defining things that could be deduced from the actual code. And that’s where Kotless comes in.
Welcome to Kotless
Kotless is based on the idea that the code you write is already defining the infrastructure it needs (infrastructure as code) and thus uses this concept to deduce the necessary configuration files, write them out, and deploy it all for you. The only thing you have to do is write Kotlin code.
Setting up AWS
If you’re already an expert in AWS, what you’ll need is
- IAM credentials (and stored locally too)
- A bucket (and region)
and you can skip the rest of this section and go directly to Writing our function.
If like me however, you’re mostly new to managing AWS, not only can it be extremely overwhelming, but the help is also overwhelming too. In this section I’ll briefly walk you through what you need to get the above set up.
Step 1 - Create an AWS account.
You need to provide credit card details, but stick to the free tier and you should be fine. In addition, make sure you set up some alerts in case you suddenly go beyond what free provides. For these demos though you most certainly won’t hit anything beyond free!
While you may want to download AWS CLI for certain management aspects, note that Kotless doesn’t need it.
Step 2 - Create IAM credentials
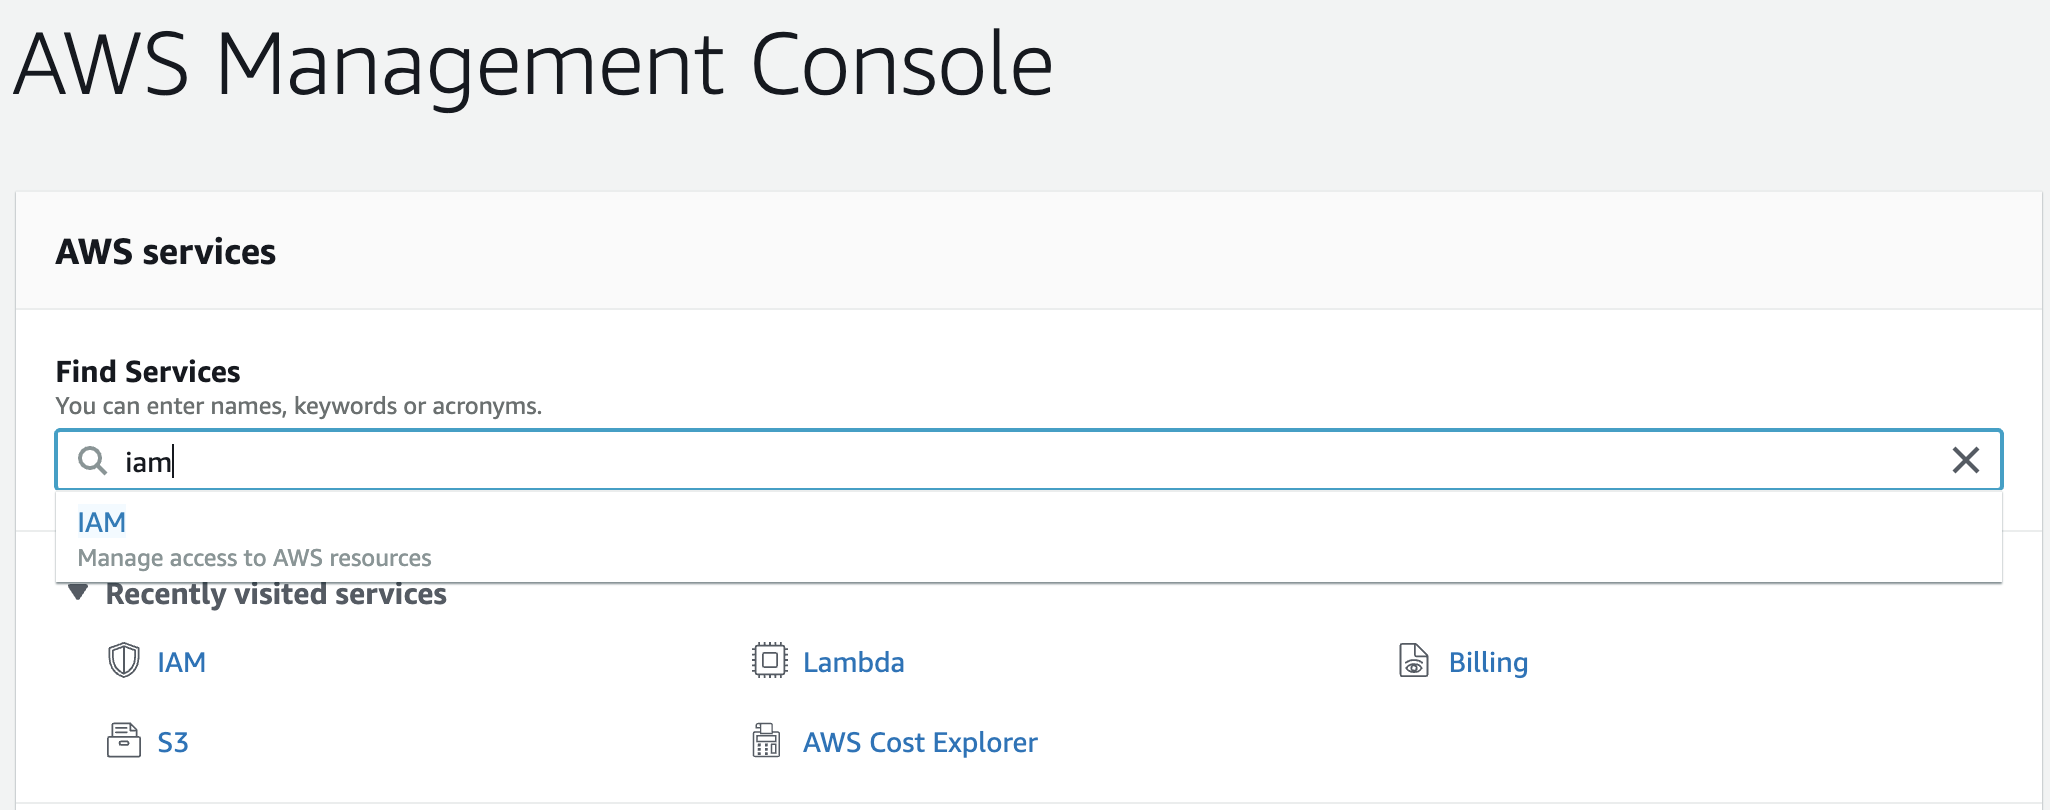
This is required by Kotless (Terraform actually) to deploy your functions. To do this, go to the AWS Management Console (make sure you’re logged in) and search for IAM
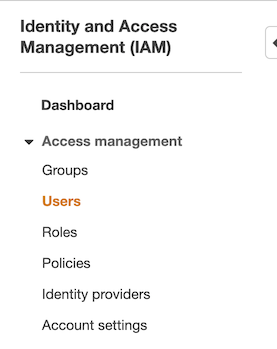
Once in the IAM section, proceed to create a new user account by clicking on Users
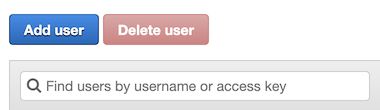
and then the Add User button
This takes you through a series of steps to provide information for the new user. It’s important to remember here the name we give the user, which is the same one which will be defined on our local machine for Kotless to use. For this example, I’ve named it my.kotless.user.
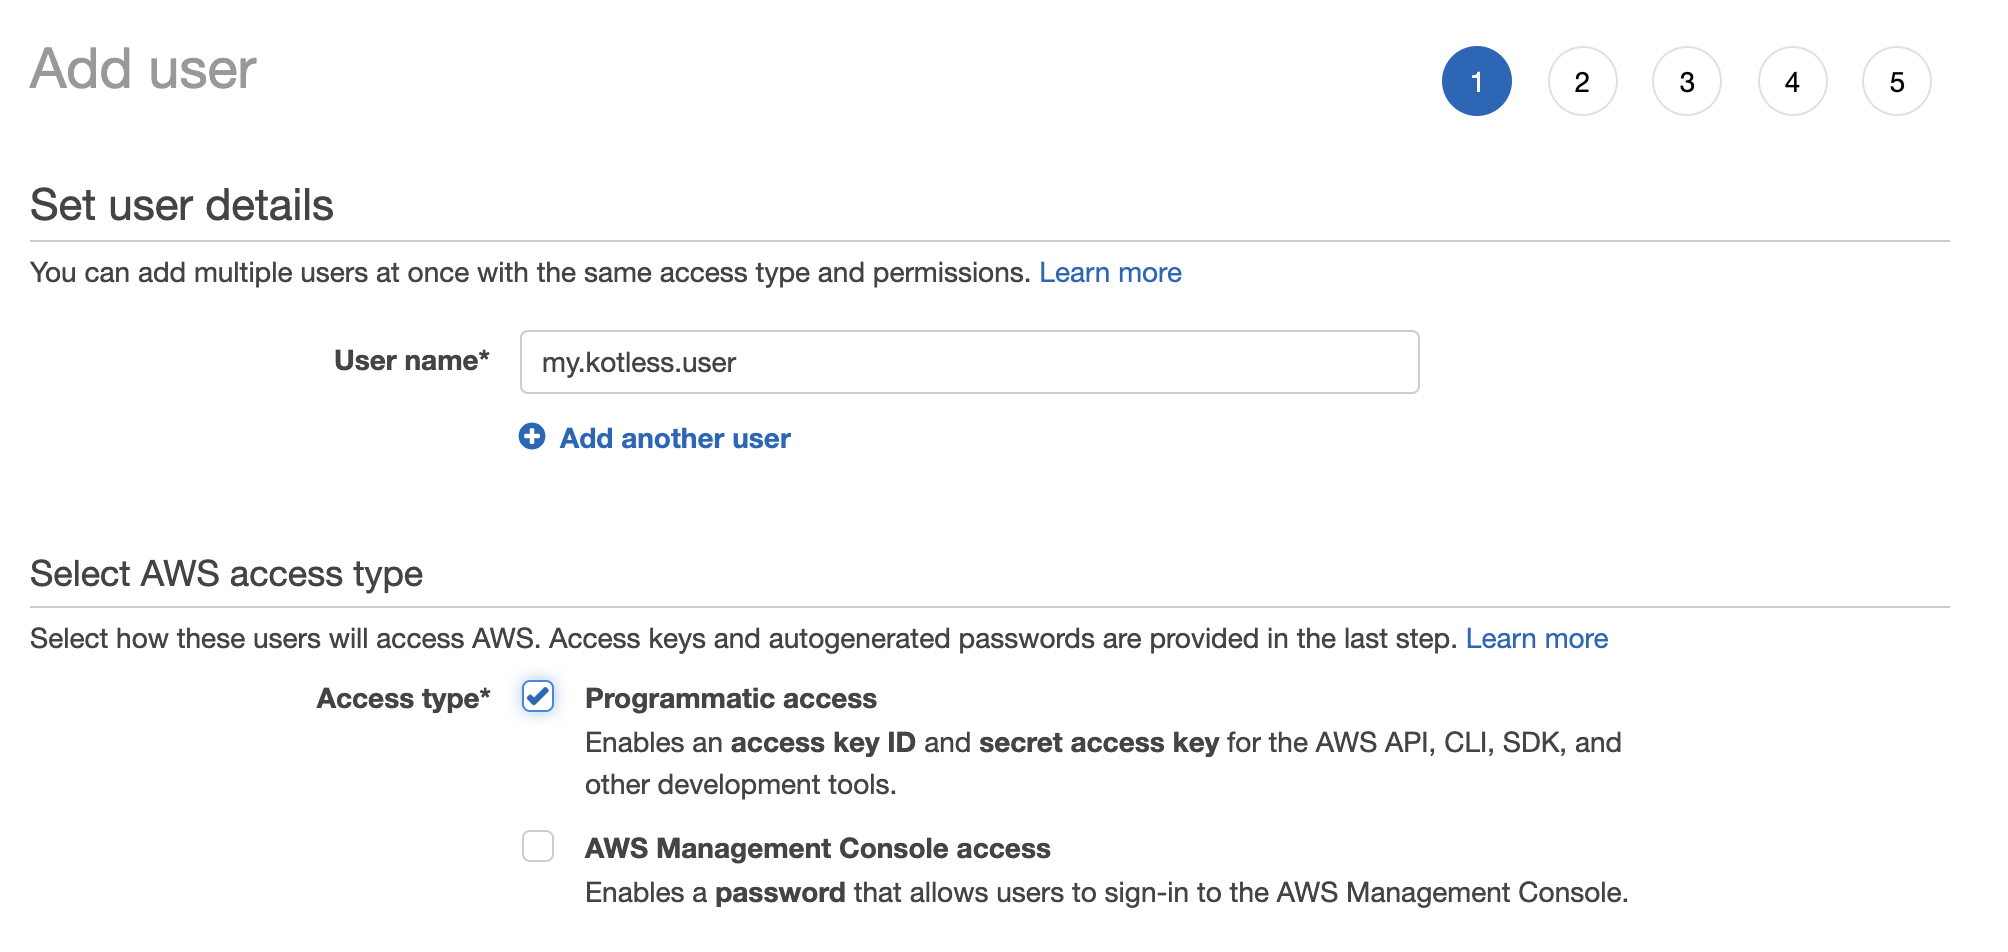
Make sure Programmatic access is ticked.
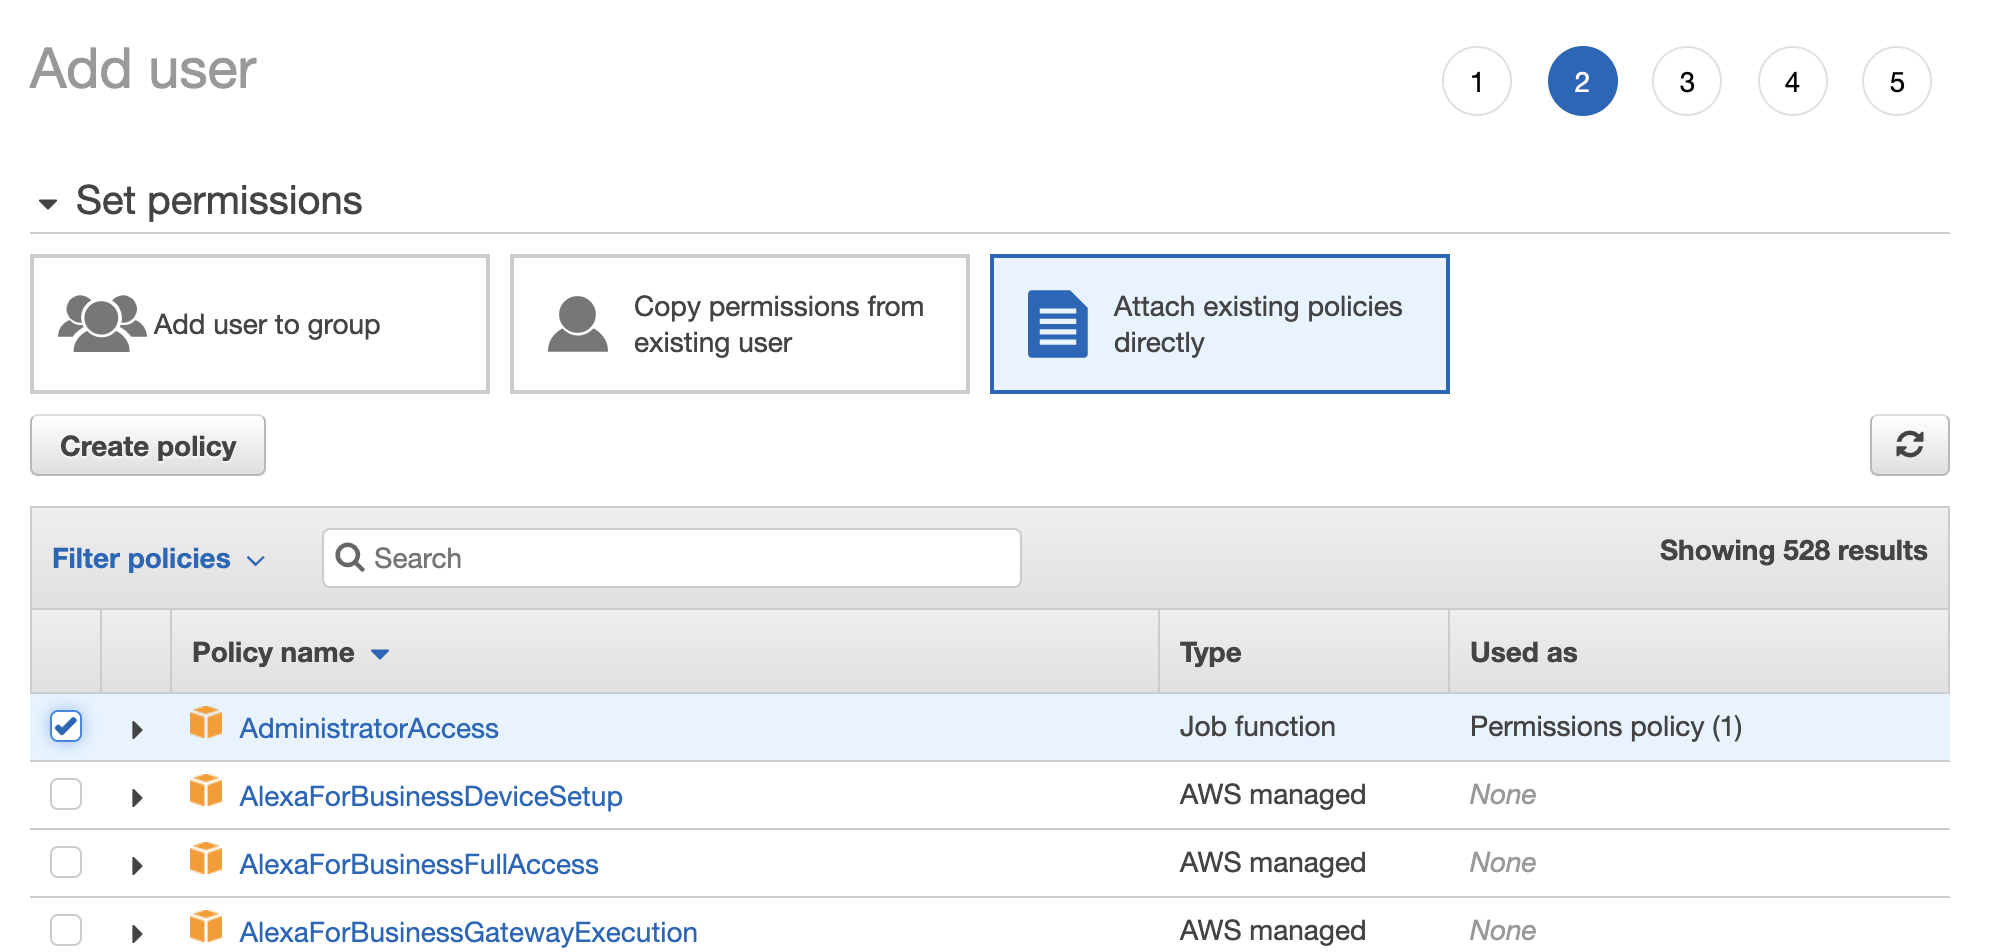
In the next step we’re going to define permissions. Obviously this needs to be fine-tuned based on what’s needed. For now we’re going to give full Admin
The next step we’ll skip (as it’s to define tags), leading us to the final step which is to review and create the user.
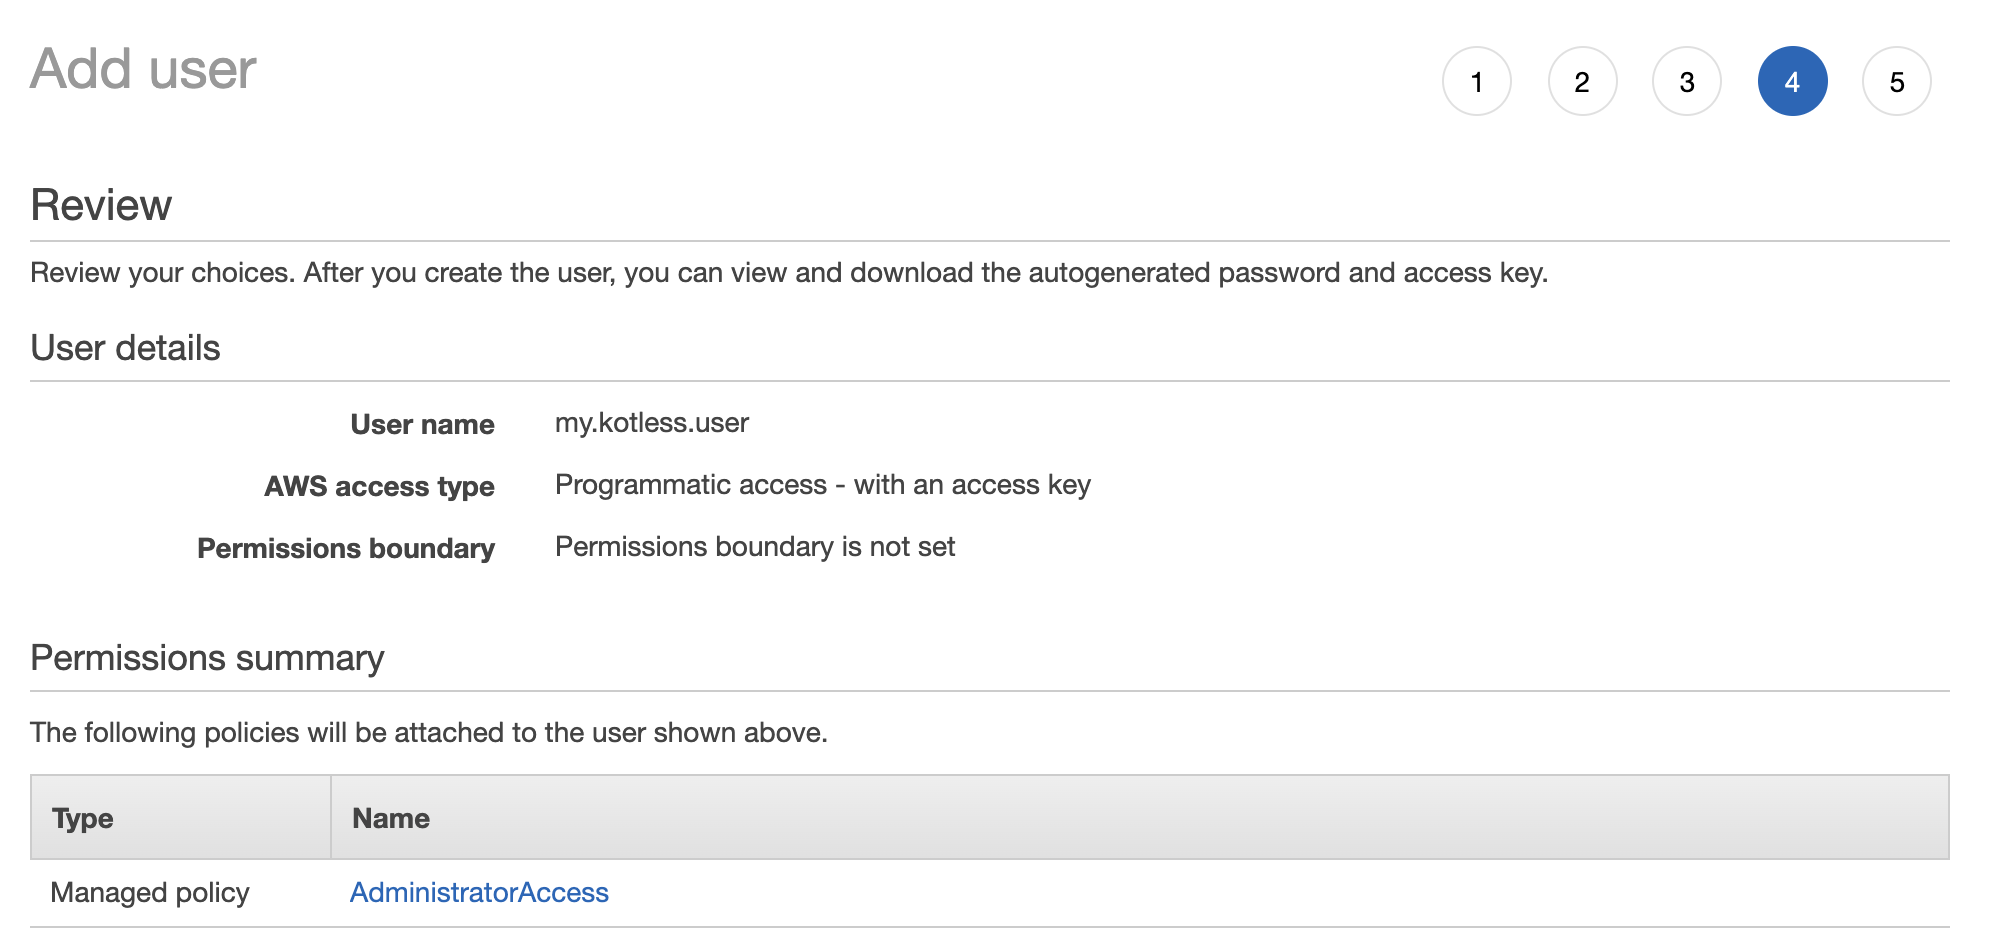
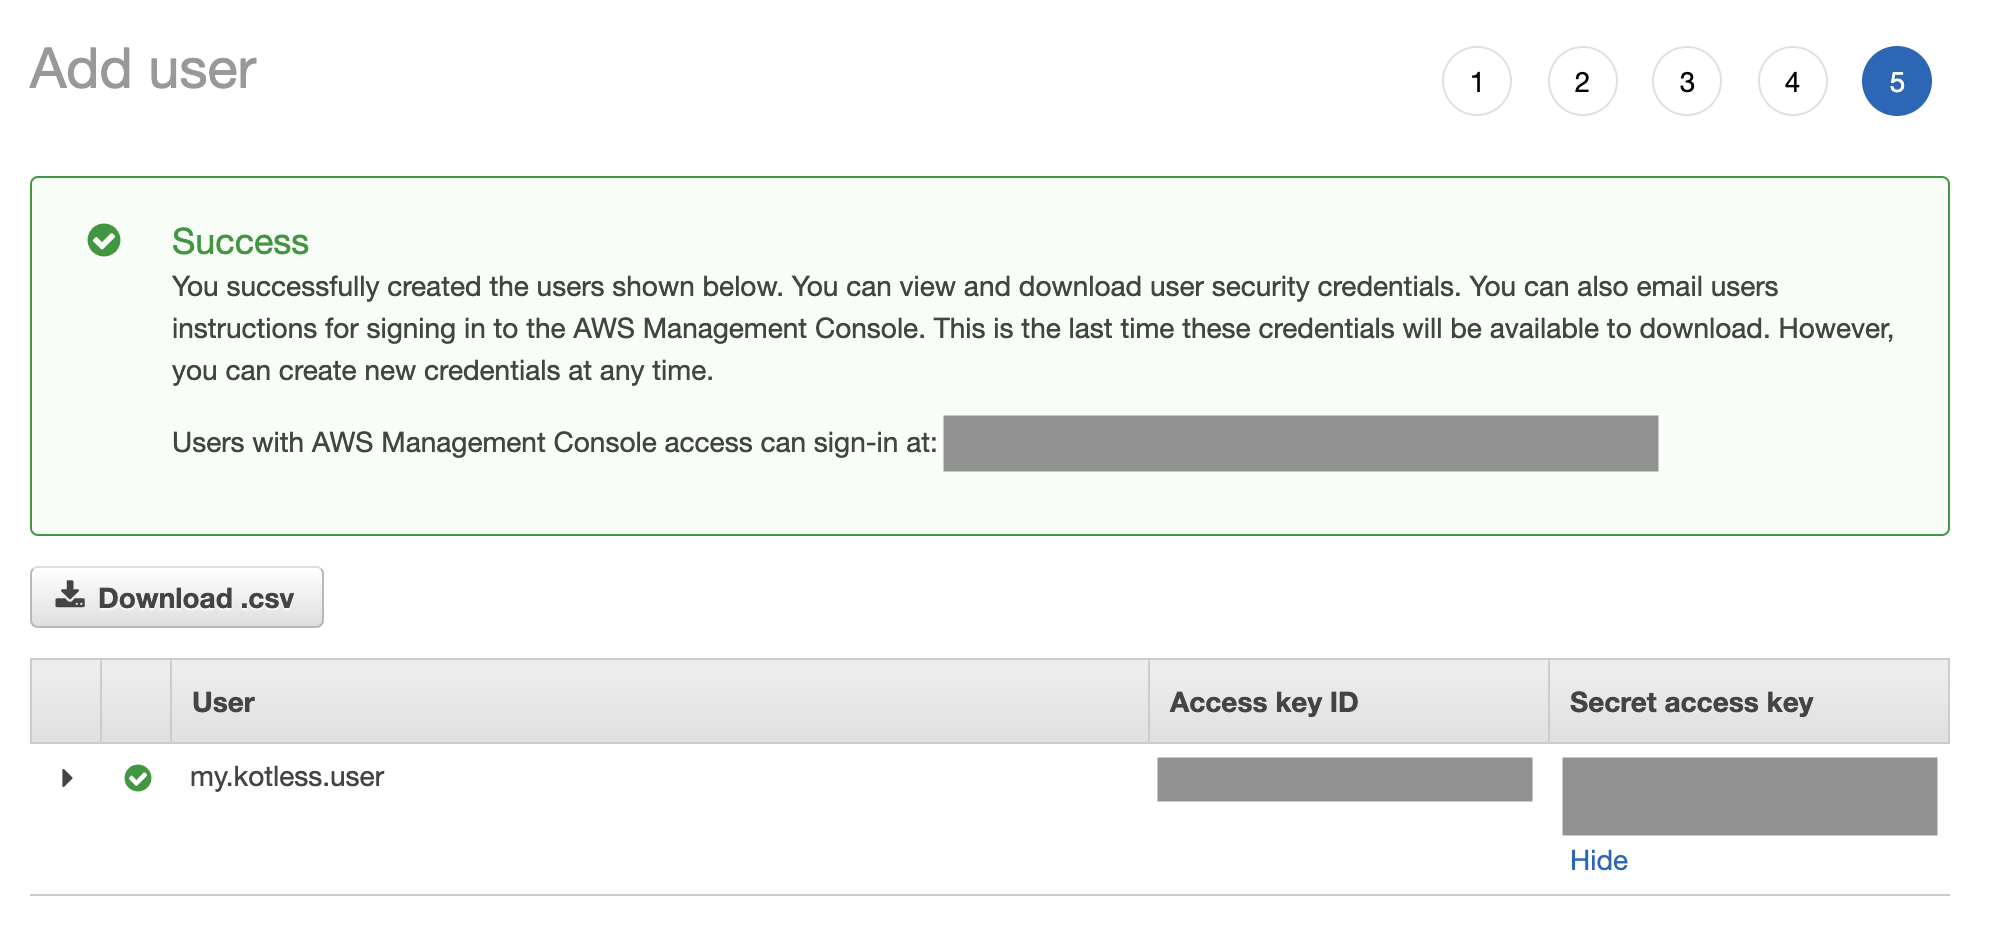
Once done, you’ll be prompted with the user along with two values: Access key ID and Secret Access key.
Step 3 - Create an S3 bucket
Go back to the AWS Management Console and search for S3.

Click on Create bucket providing a name and region. Again, keep track of these two values as we’ll use them later.
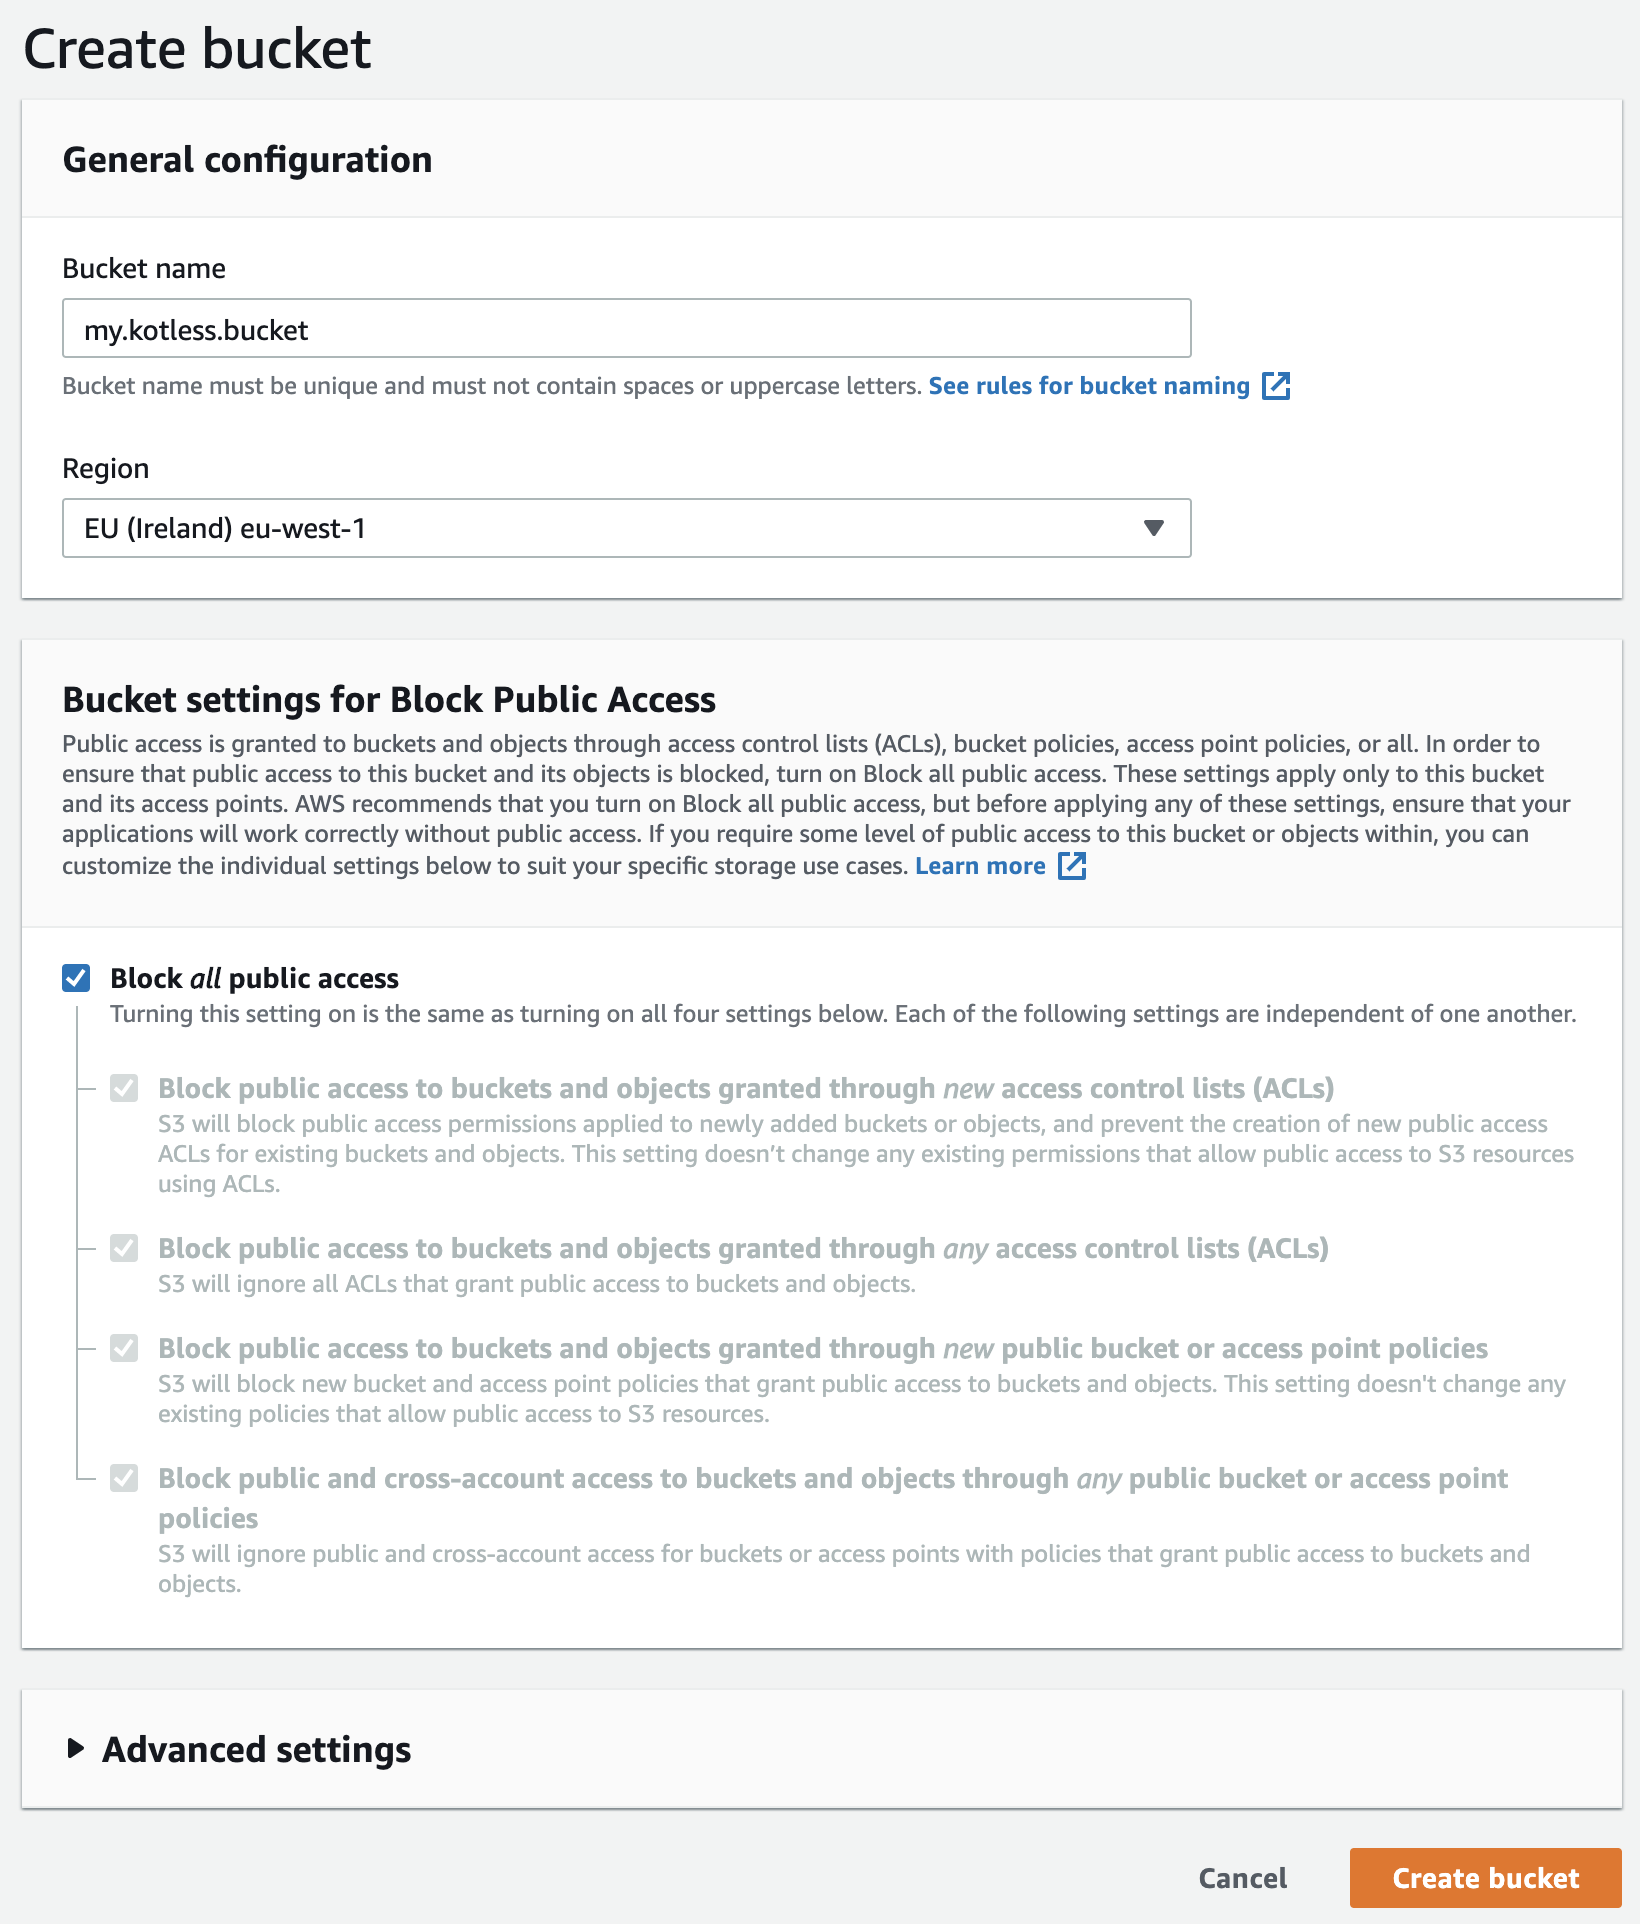
Leave all other options as default.
Step 4 - Store the credentials locally
Kotless is going to need access to the credentials created, and we need to somehow provide these. These are stored in the user directory (on macOS/Linux this would be ~/.aws and on Windows in the home directory).
Create a file name ~/.aws/credentials and type in the following contents
[profile my.kotless.user]
aws_access_key_id={the_access_key_id}
aws_secret_access_key={the_secret_access_key}
Notice how the profile name matches the name of the IAM credential we created earlier.
And that’s it. We’re now ready to write our function and deploy with Kotless.
Important - When you set up your AWS account, the system itself asks you to follow a series of good practices, such as removing root access, setting up MFA, defining groups with restricted permissions, etc. It’s important to go back and do this at some point. I’m avoiding it in here cause I know HOW EXCITED YOU ARE TO SEE THIS WORK! So let’s move on.
Writing our function
Create a new build.gradle.kts project with the following contents (Kotless only supports Gradle Kotlin Script)
import io.kotless.plugin.gradle.dsl.kotless
import org.jetbrains.kotlin.gradle.dsl.KotlinJvmCompile

group = "com.example.kotless"
version = "0.1"

plugins {
   kotlin("jvm") version "1.3.61" apply true
   id("io.kotless") version "0.1.3" apply true
}

repositories {
   jcenter()
   mavenCentral()
}

dependencies {
   implementation(kotlin("stdlib"))
   implementation("io.kotless", "lang", "0.1.3")
}

tasks.withType<KotlinJvmCompile> {
   kotlinOptions {
       jvmTarget = "1.8"
       languageVersion = "1.3"
       apiVersion = "1.3"
   }
}
The settings.gradle.kts should contain
rootProject.name = "kotless"

pluginManagement {
   repositories {
       gradlePluginPortal()
   }
}
and import it into IntelliJ IDEA (or your IDE of choice). Now create a new package with the same name as that provided in the group (this is important) and inside it create a new file named anything - we’ll call it Functions.kt
package com.example.kotless

import io.kotless.dsl.lang.http.Get

fun sayHello() = "Say Hello!"
So far, the only thing we’ve done is simply create a function that returns a string. What we want to do now is tell Kotless (i.e. AWS Lambda), where we want to respond with this function, i.e. what endpoint. For this we annotate the function with a @Get.
@Get("/hello")
fun sayHello() = "Say Hello!"
Testing locally
Before deploying, we can test this locally to see if it works by running the Gradle local task, and opening up the browser at http://0.0.0.0:8080/hello
Deploying to AWS
If everything works well, we can now proceed to deploy to AWS. For this we need to tell Kotless a few things, namely the profile, bucket (and region), we created earlier.
Add the following configuration block to the end of the build.gradle.kts file
kotless {
   config {
       bucket = "my.kotless.bucket"

       terraform {
           profile = "my.kotless.user"
           region = "eu-west-1"
       }
   }
   webapp {
       lambda {
           kotless {
               packages = setOf("com.example.kotless")
           }
       }
   }
}
Notice how we’re using the previously defined values, namely my.kotless.bucket, eu-west-1, my.kotless.user, and com.example.kotless. It’s important to get this correct.
That’s all that’s needed. Now we can simply run the Gradle deploy task and watch as magic happens!
If all goes well, the process should end with build output providing you the root URL where you can access the function
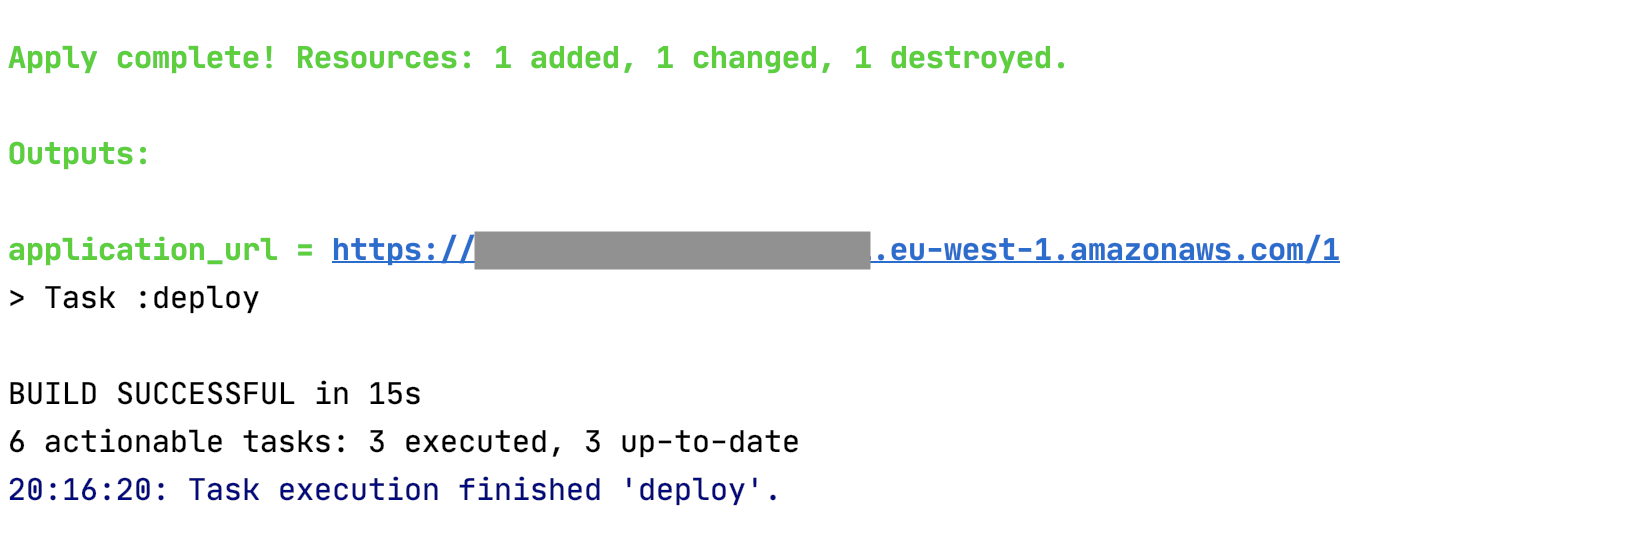
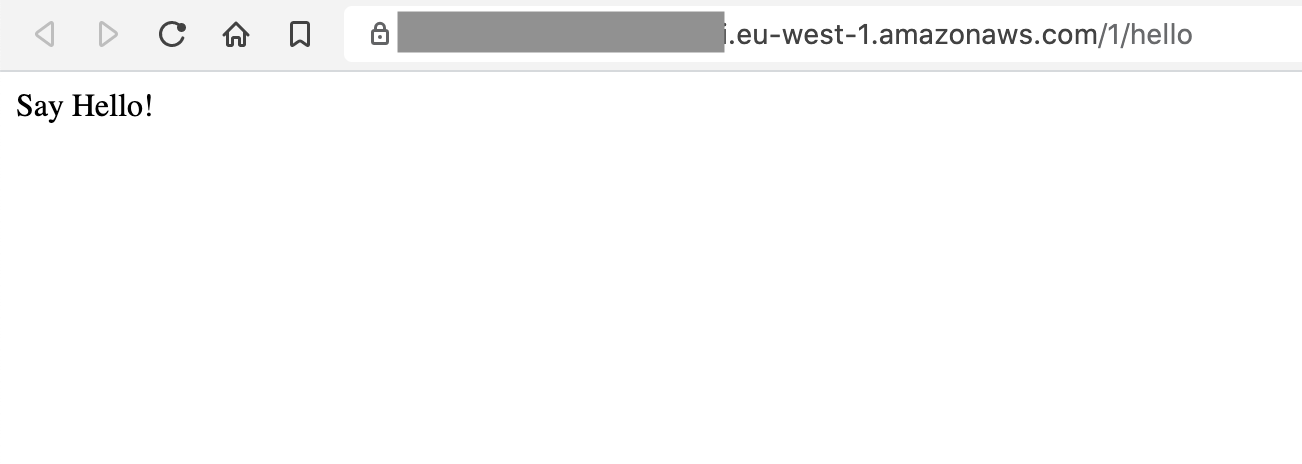
Copying the URL to the browser and appending /hello should give the text output from the function.
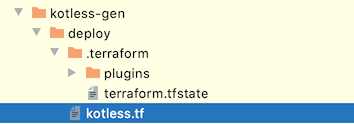
By the way, if you’re interested in seeing the generated Terraform files, check these under the build/kotless-gen/deploy folder in the project.
But wait, there’s more
Kotless not only supports simple functions but also Ktor server-side applications, meaning you could now deploy your Ktor apps as lambdas. When it comes to AWS resources, there’s support for DynamoDB, static resources, and more. And in cases where you still need extra customization , you can write Terraform extensions.
Currently it only supports AWS but the actual code already provides a layer of abstraction making it possible to add support for Google Cloud and Azure. Imagine being able to take advantage of serverless technology without having vendor lock-in (to a certain extent at least). And to do all this without needing to write massive amounts of Terraform configuration files. This is where Kotless is providing value!
The project itself is OSS and available on GitHub, and gladly accepts contributions.
Before wrapping up, I wanted to thank my colleague Vladislav Tankov, for not only creating this awesome framework, but also for his help and reviews.